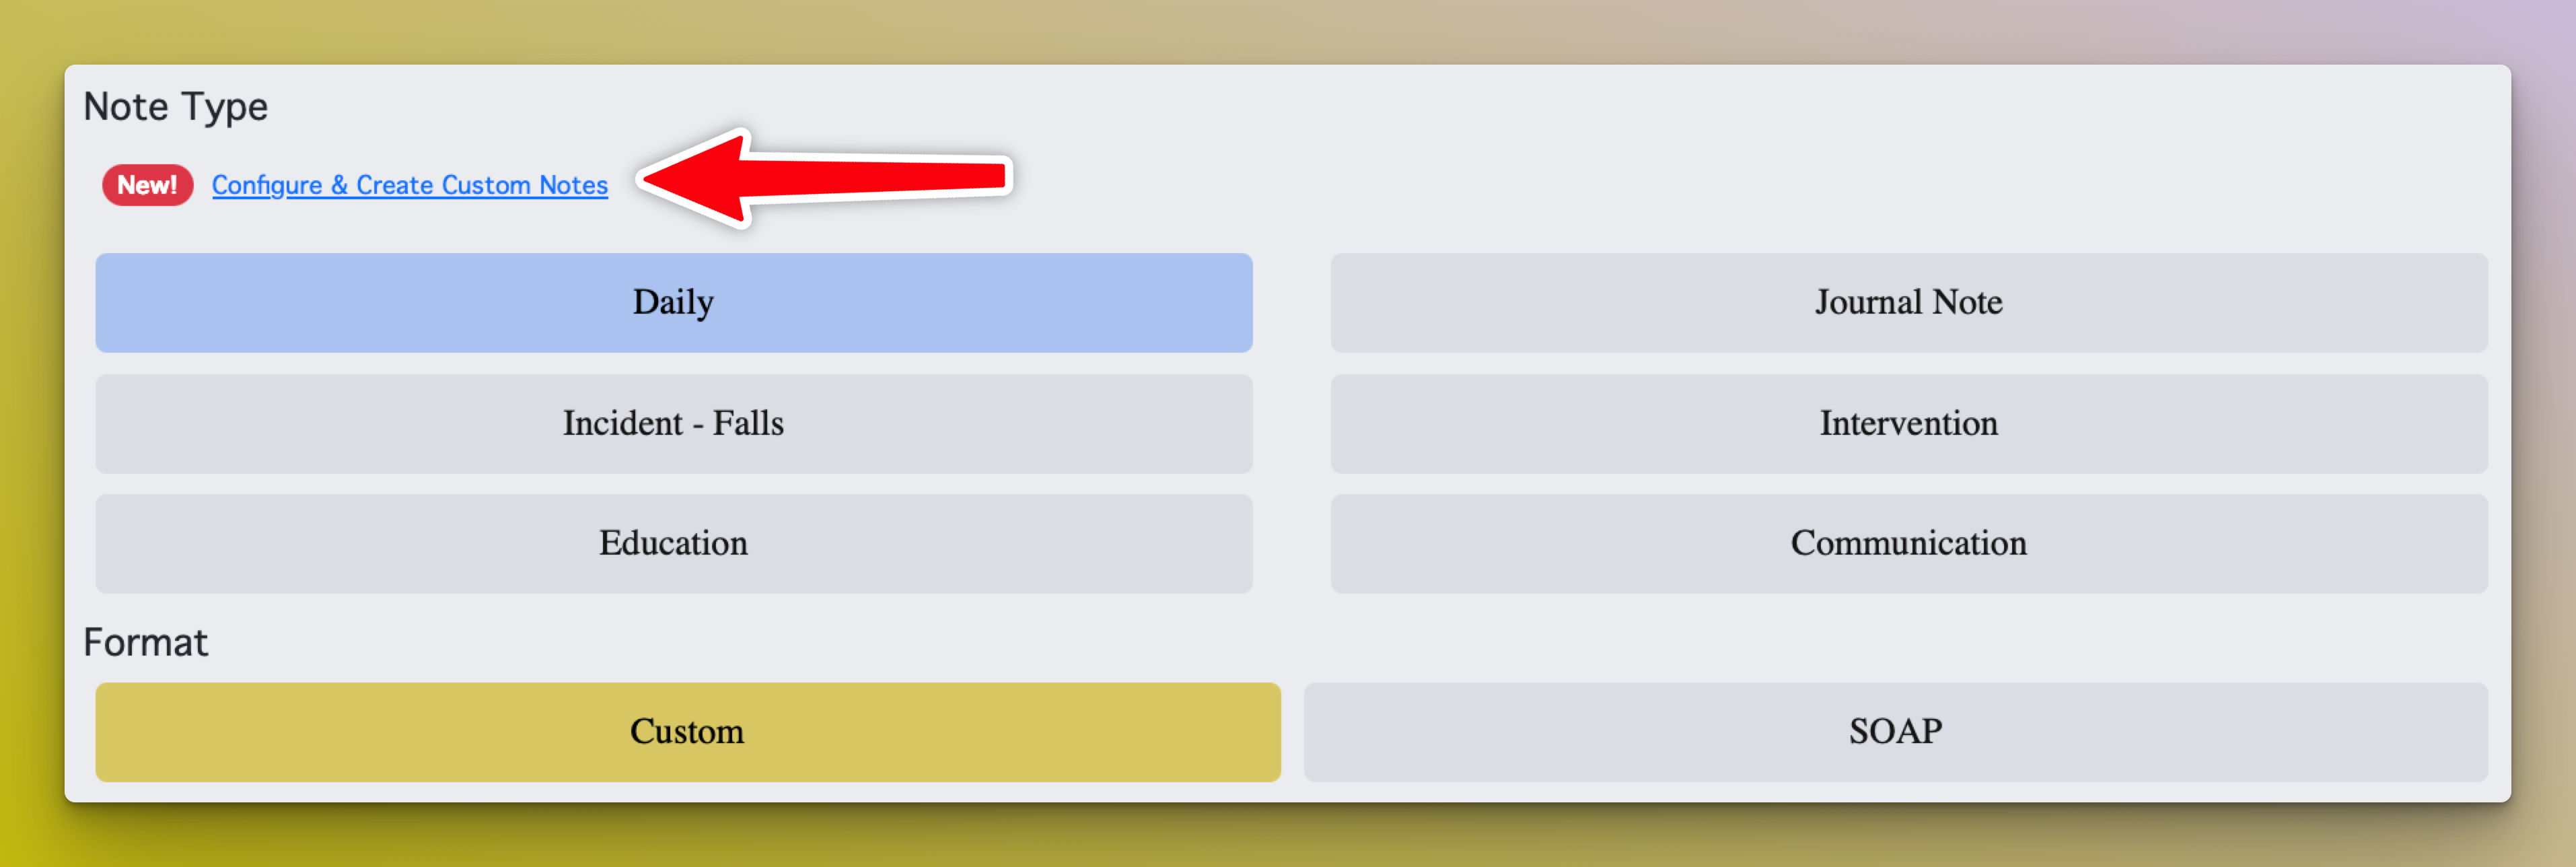
Customize your AI Assistant home page, re-order notes, test, and create your own custom notes. Click the link to access custom note tools where you can: Tap the three-dot menu to open note options.Configure and Create Custom Notes
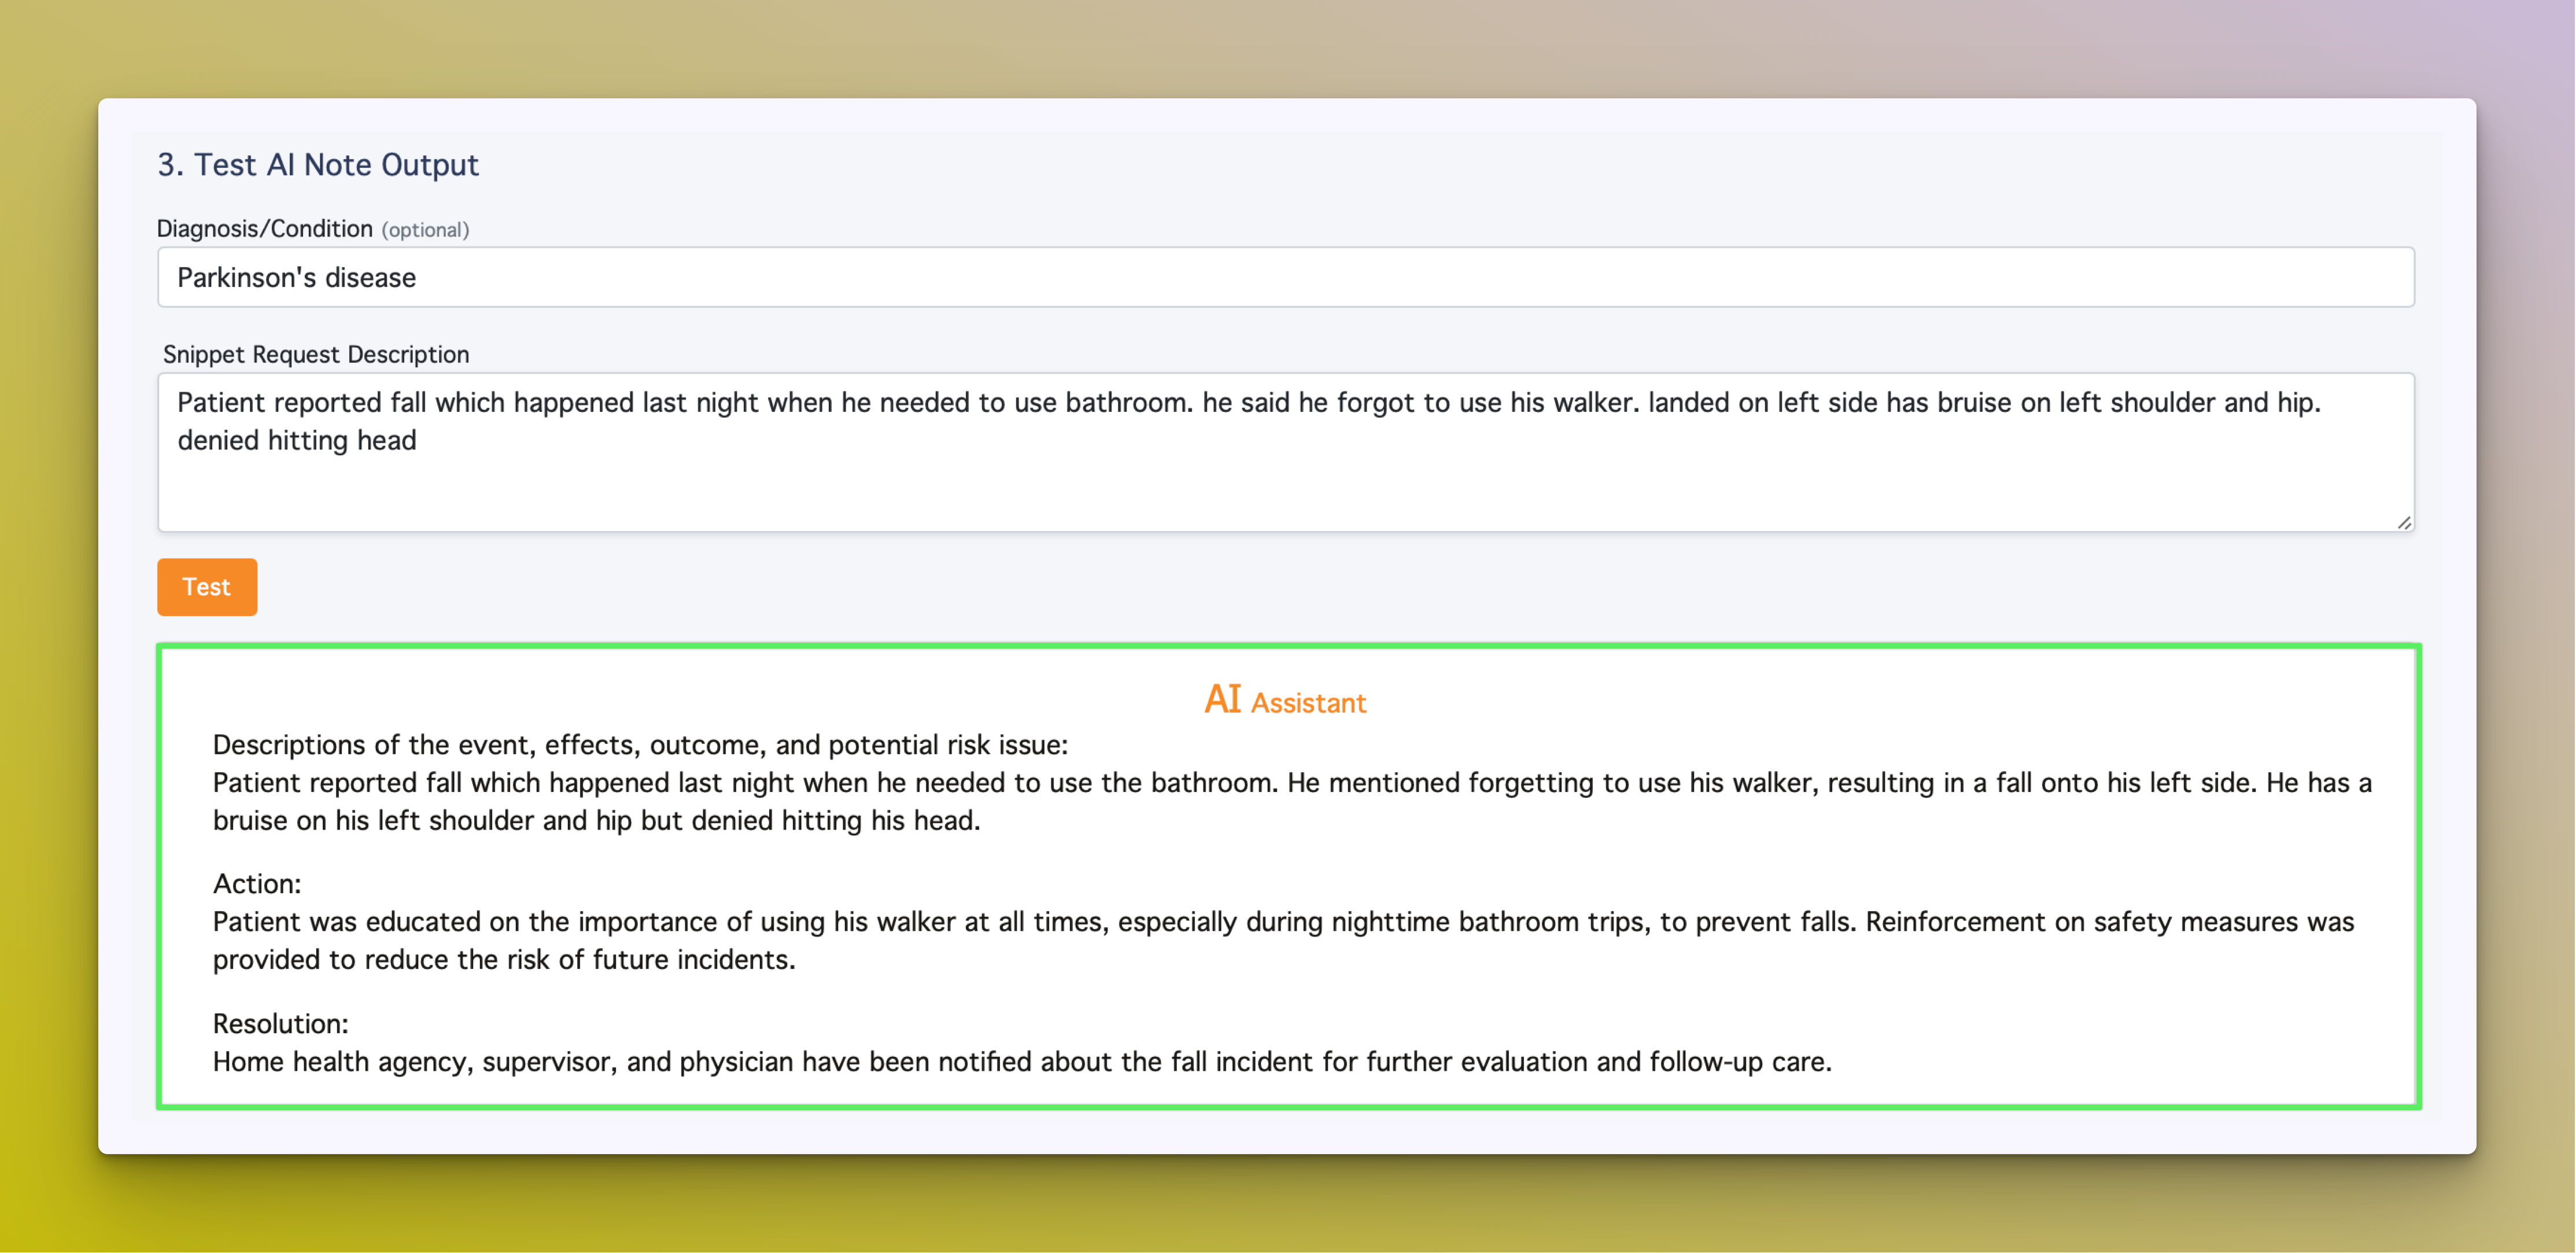
AI Assistant Playground
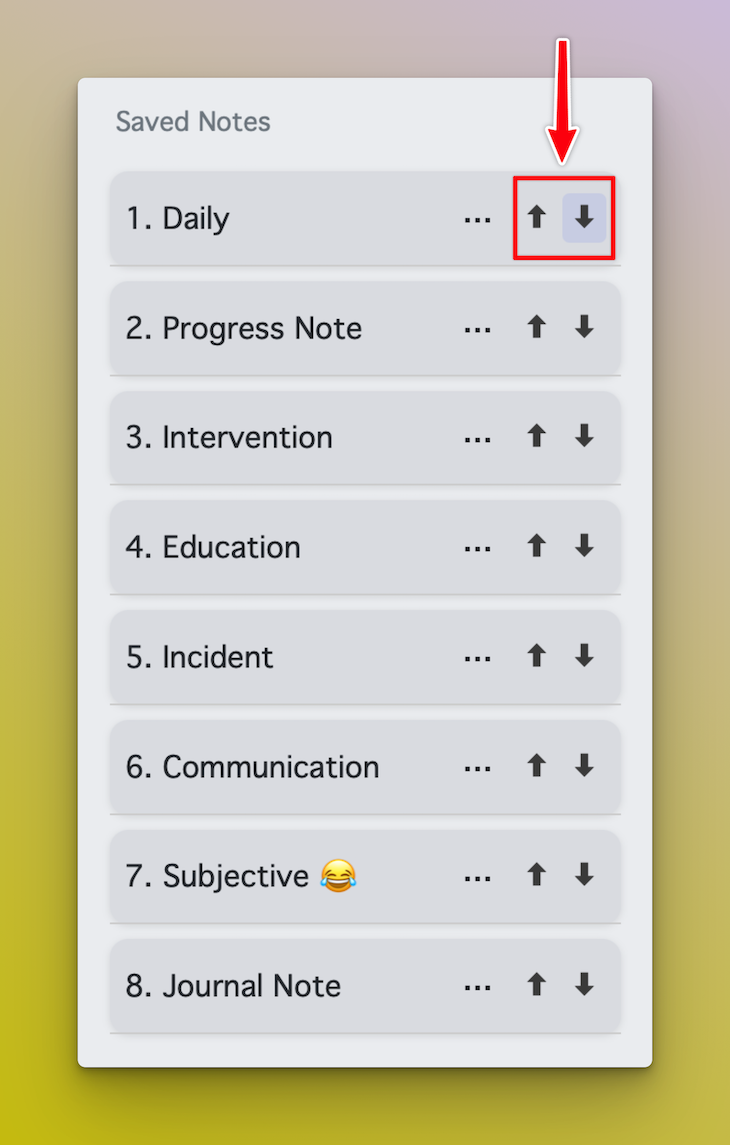
Re-ordering Notes
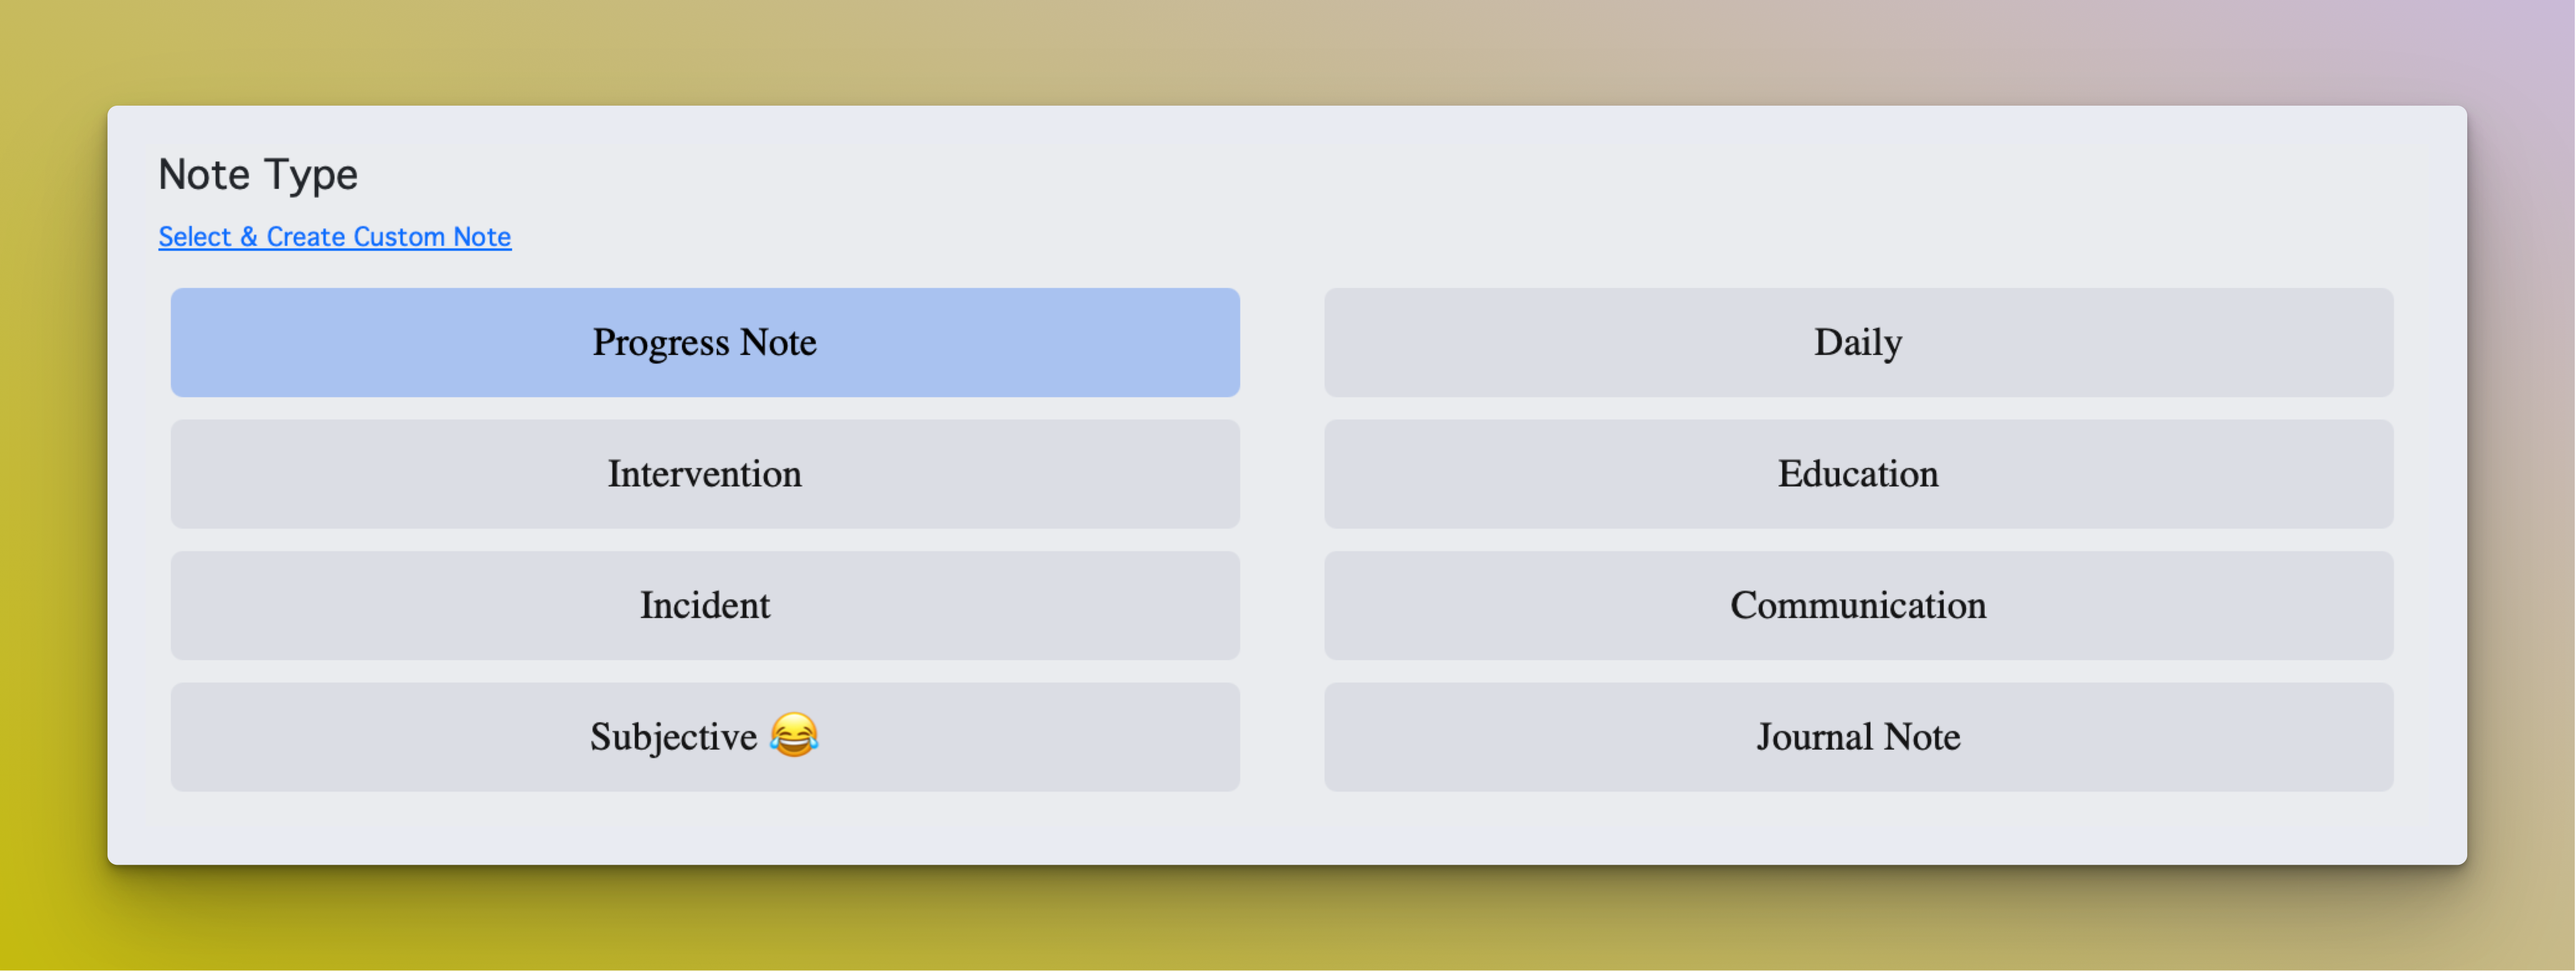
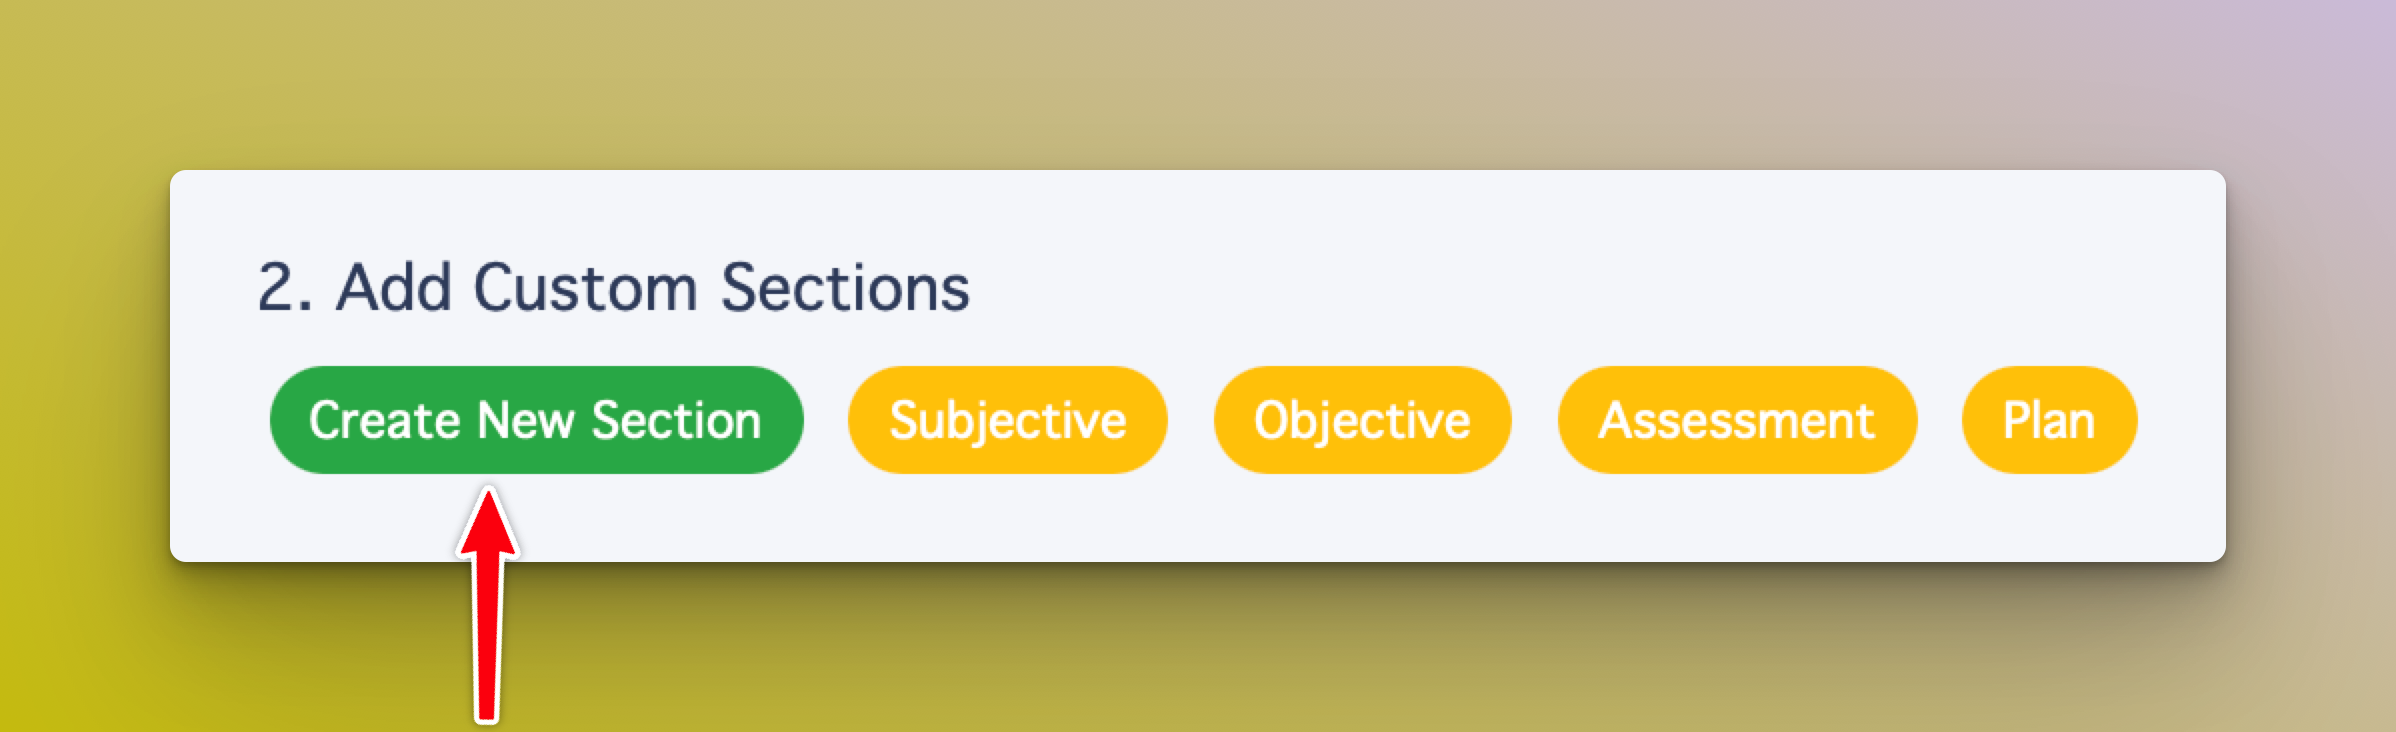
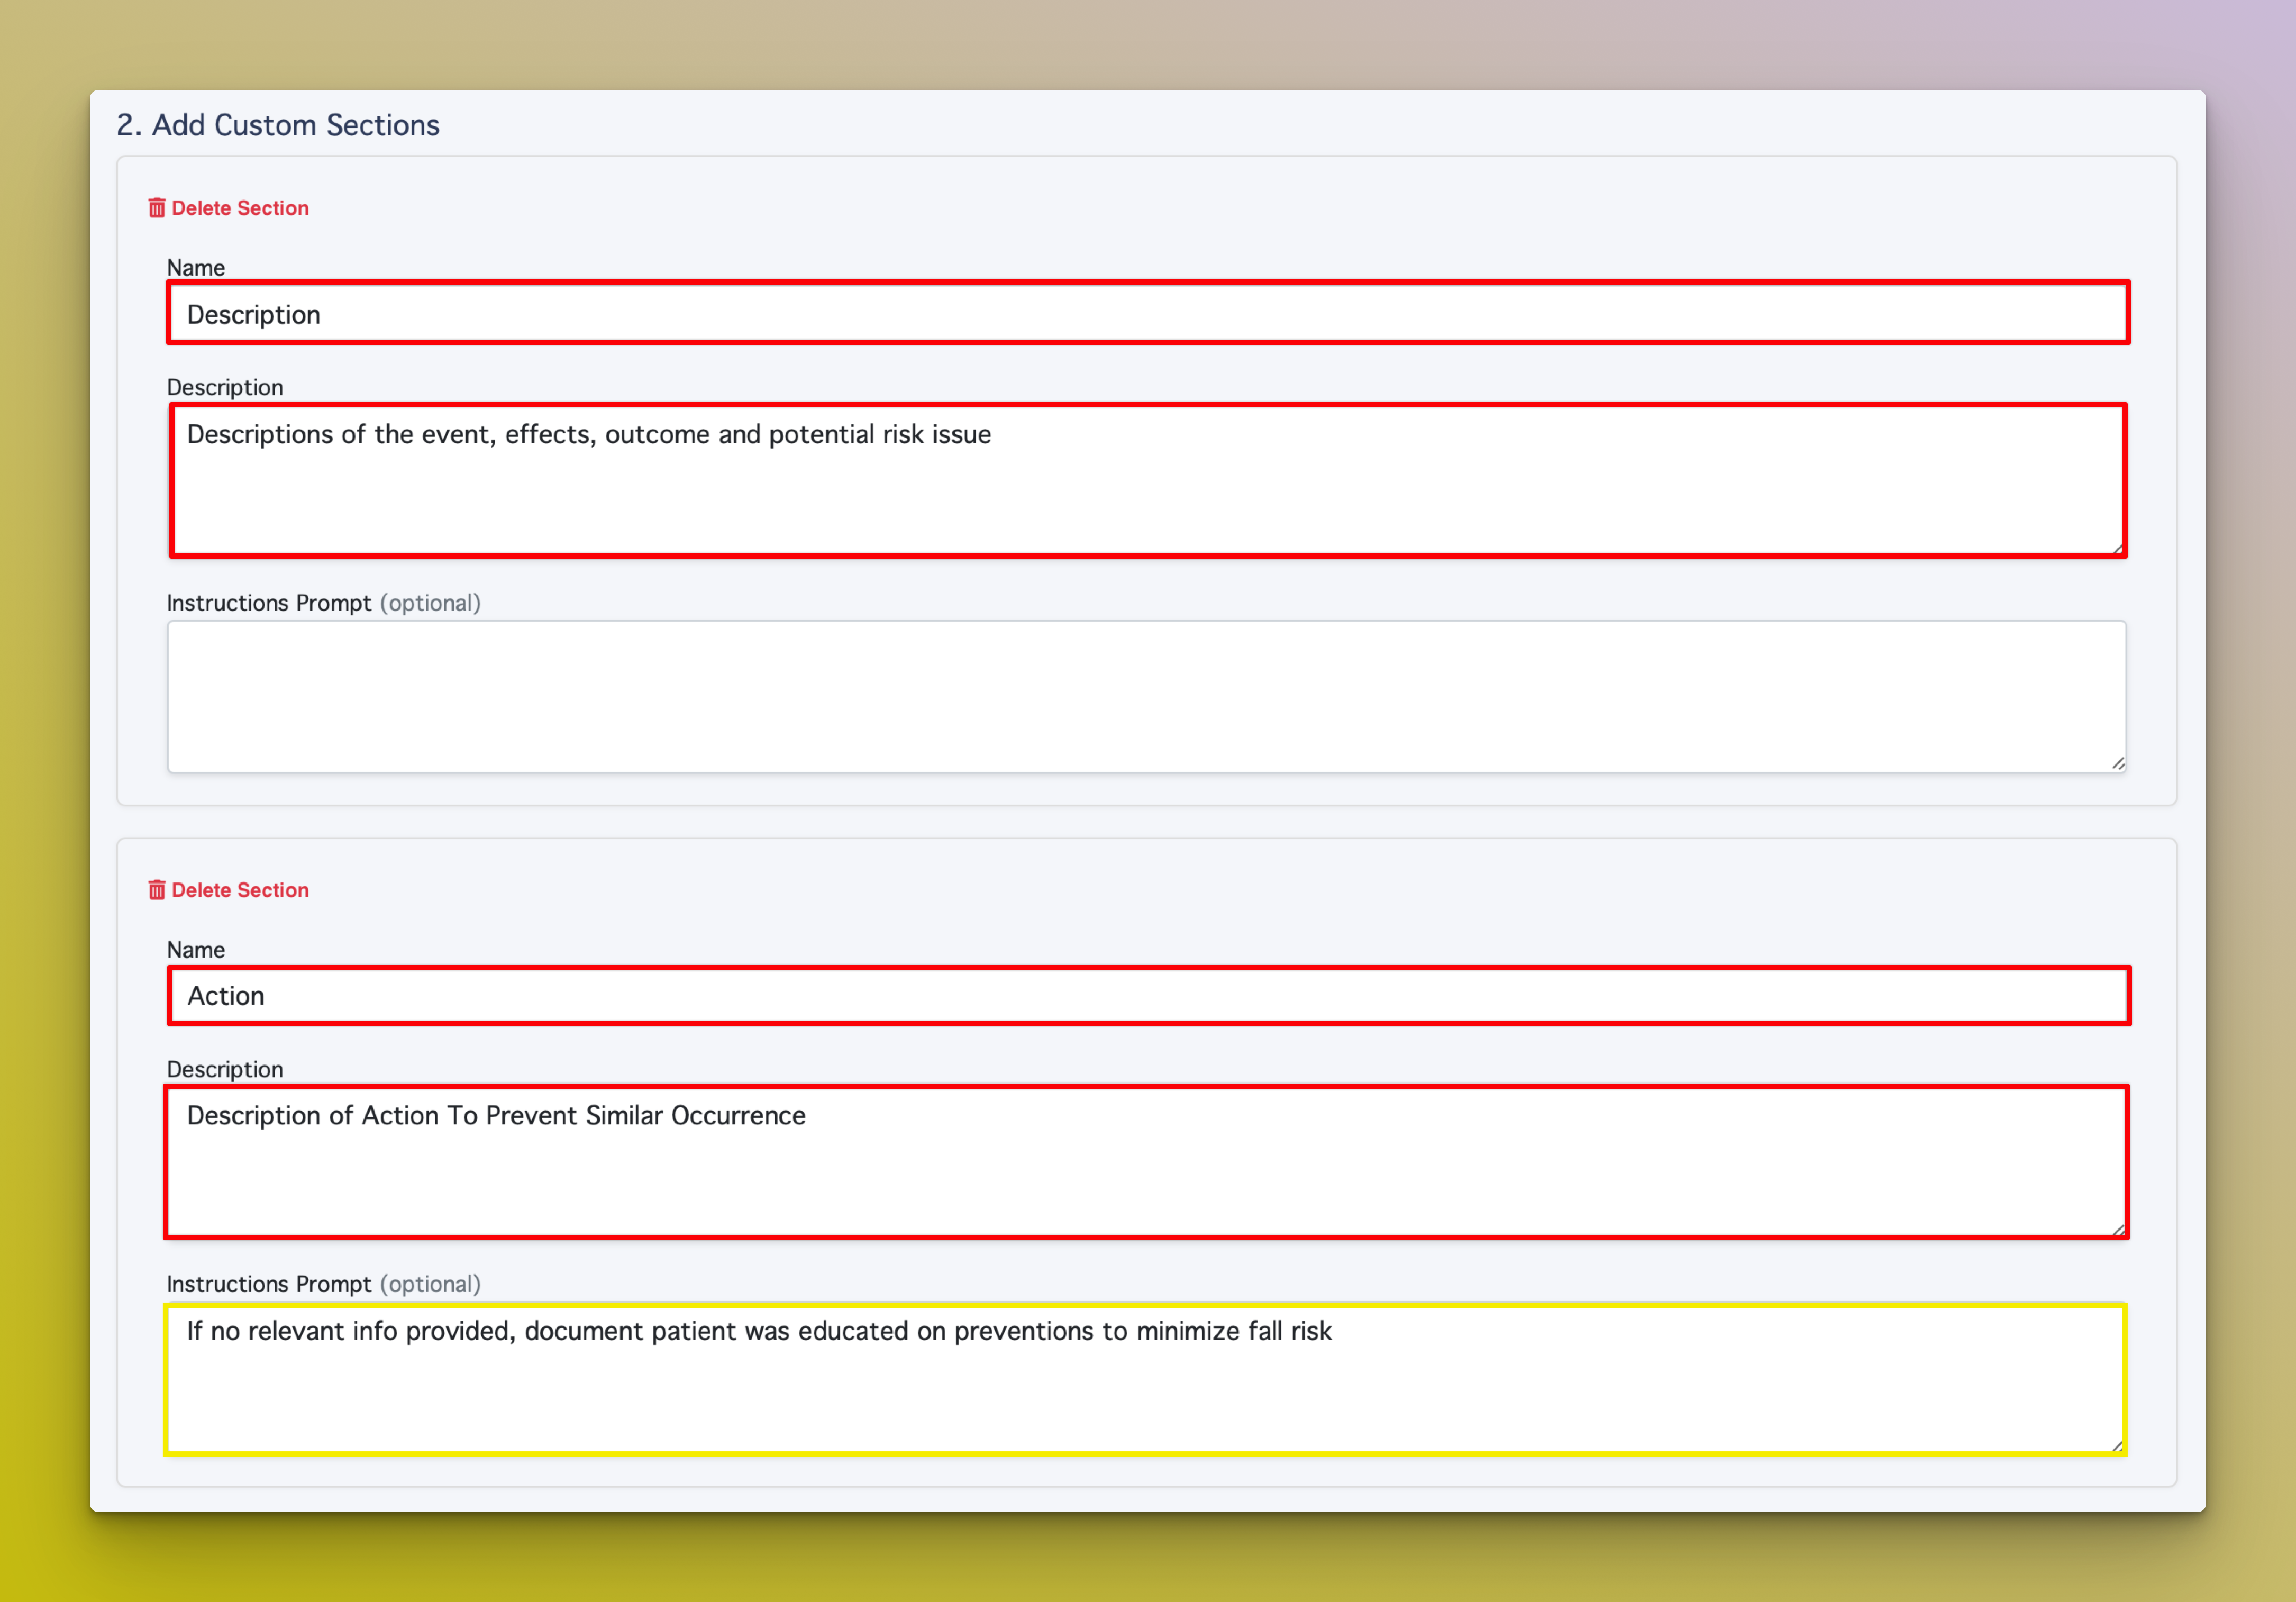
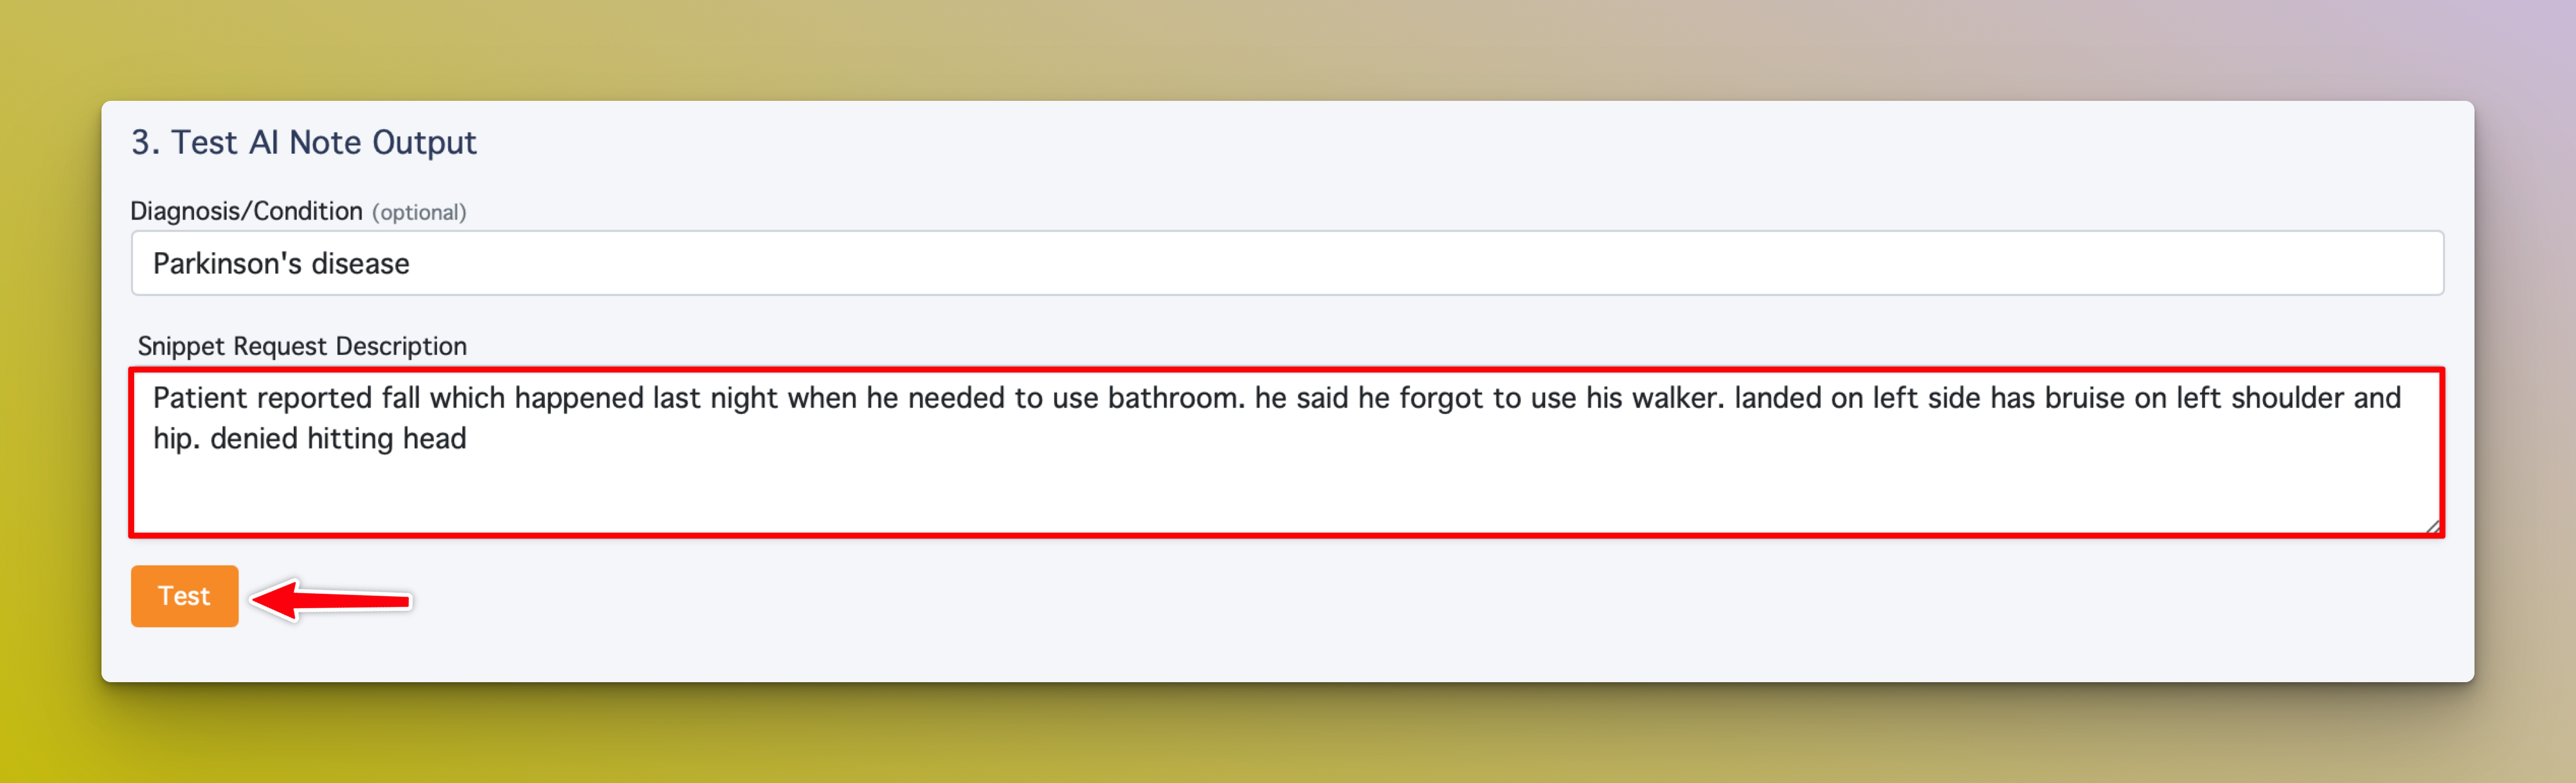
Create Custom Note
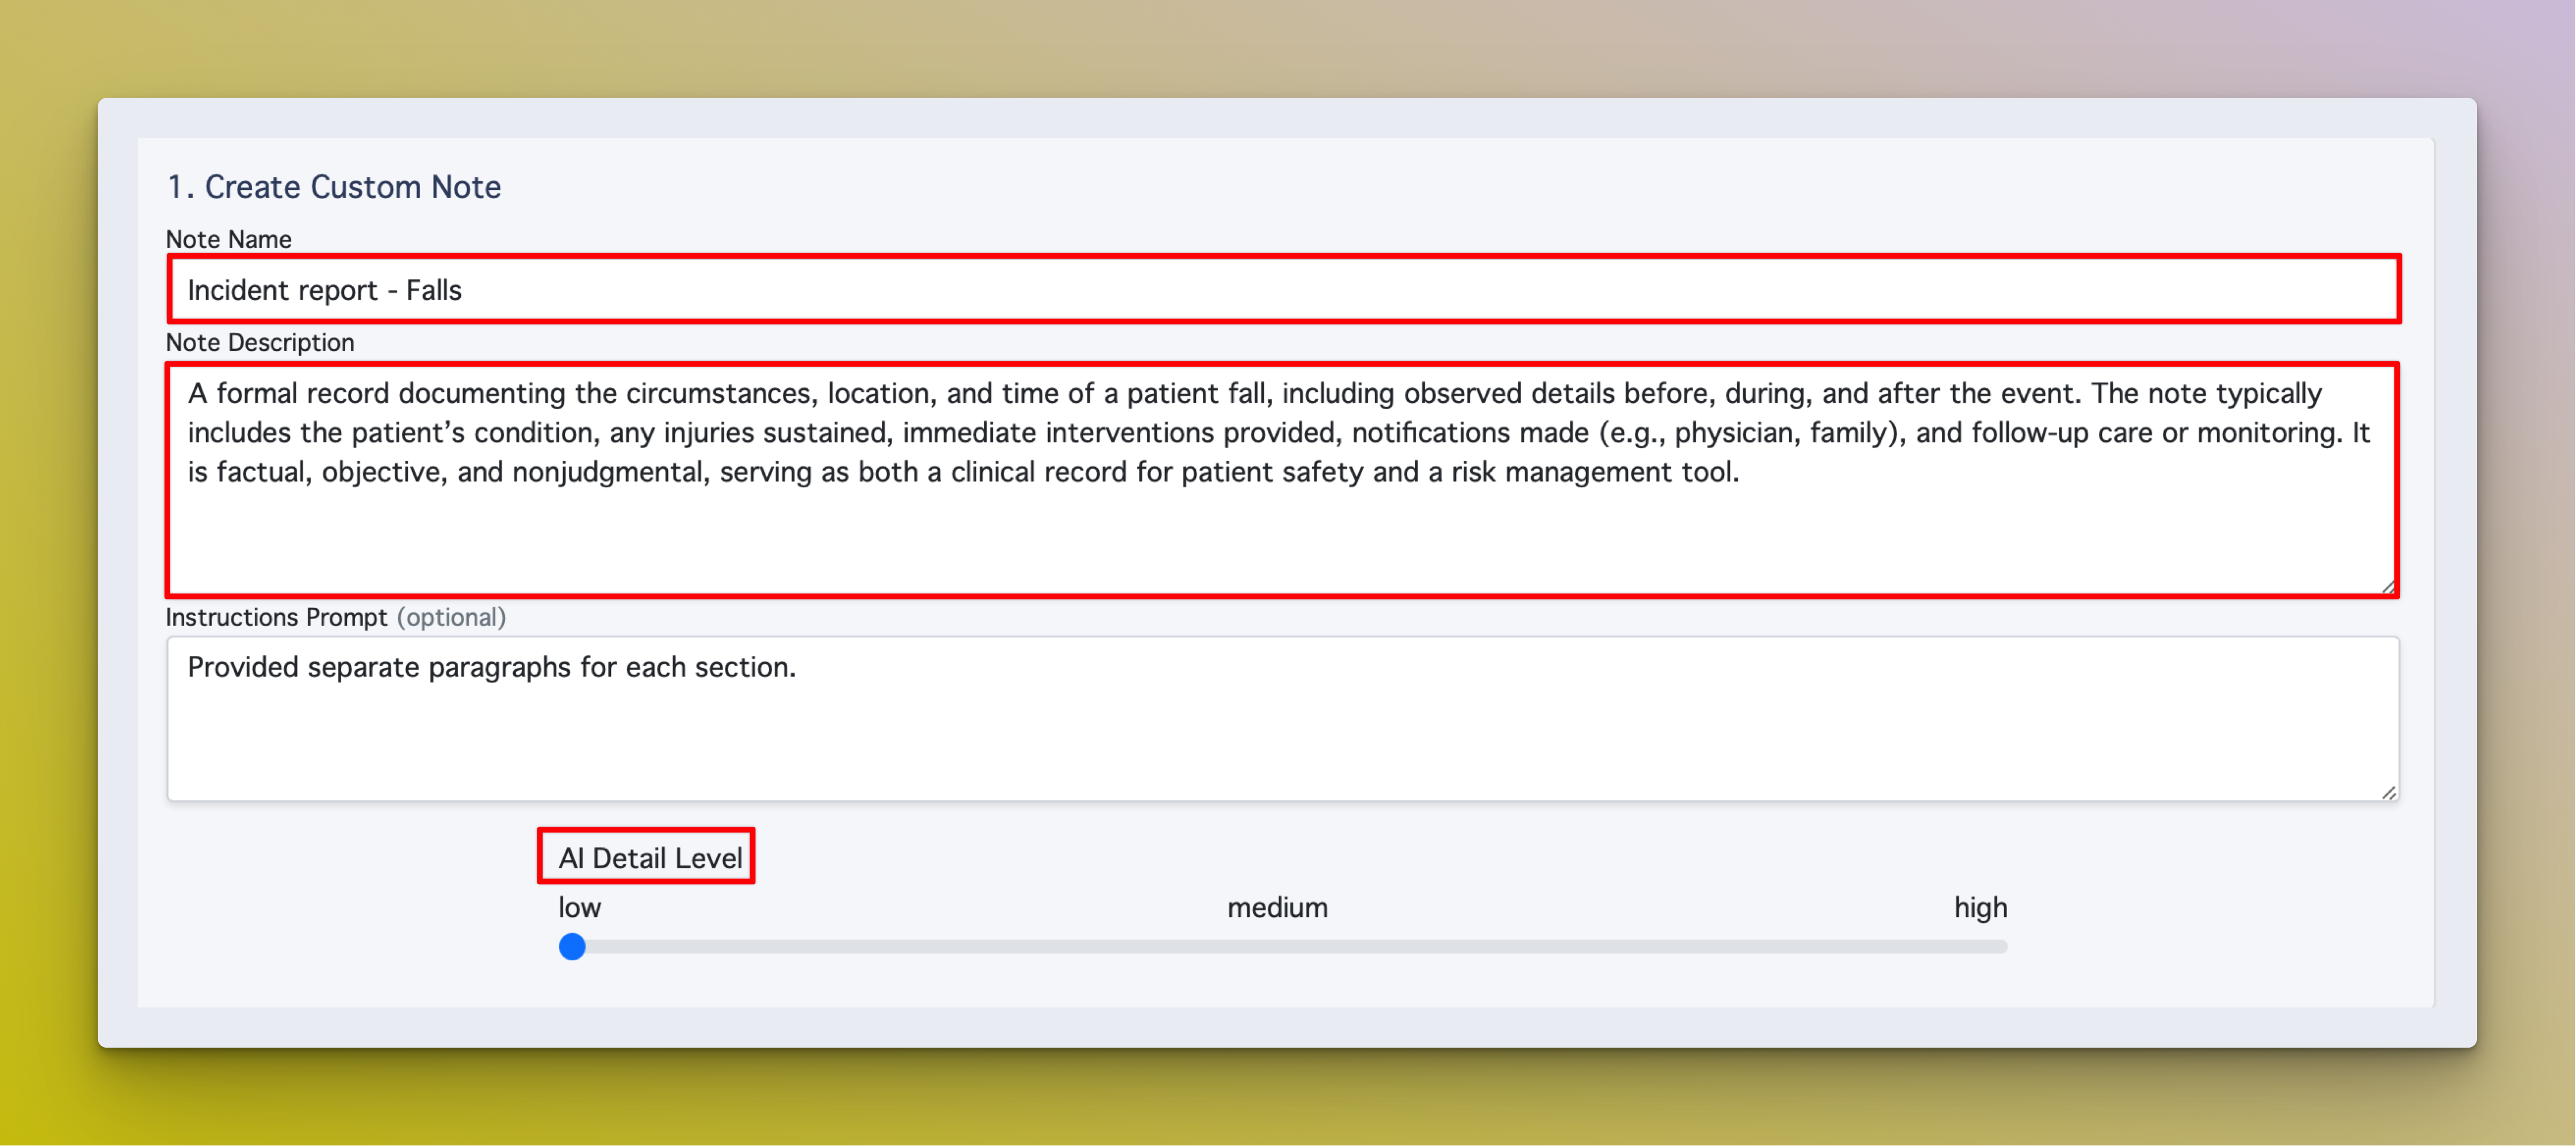
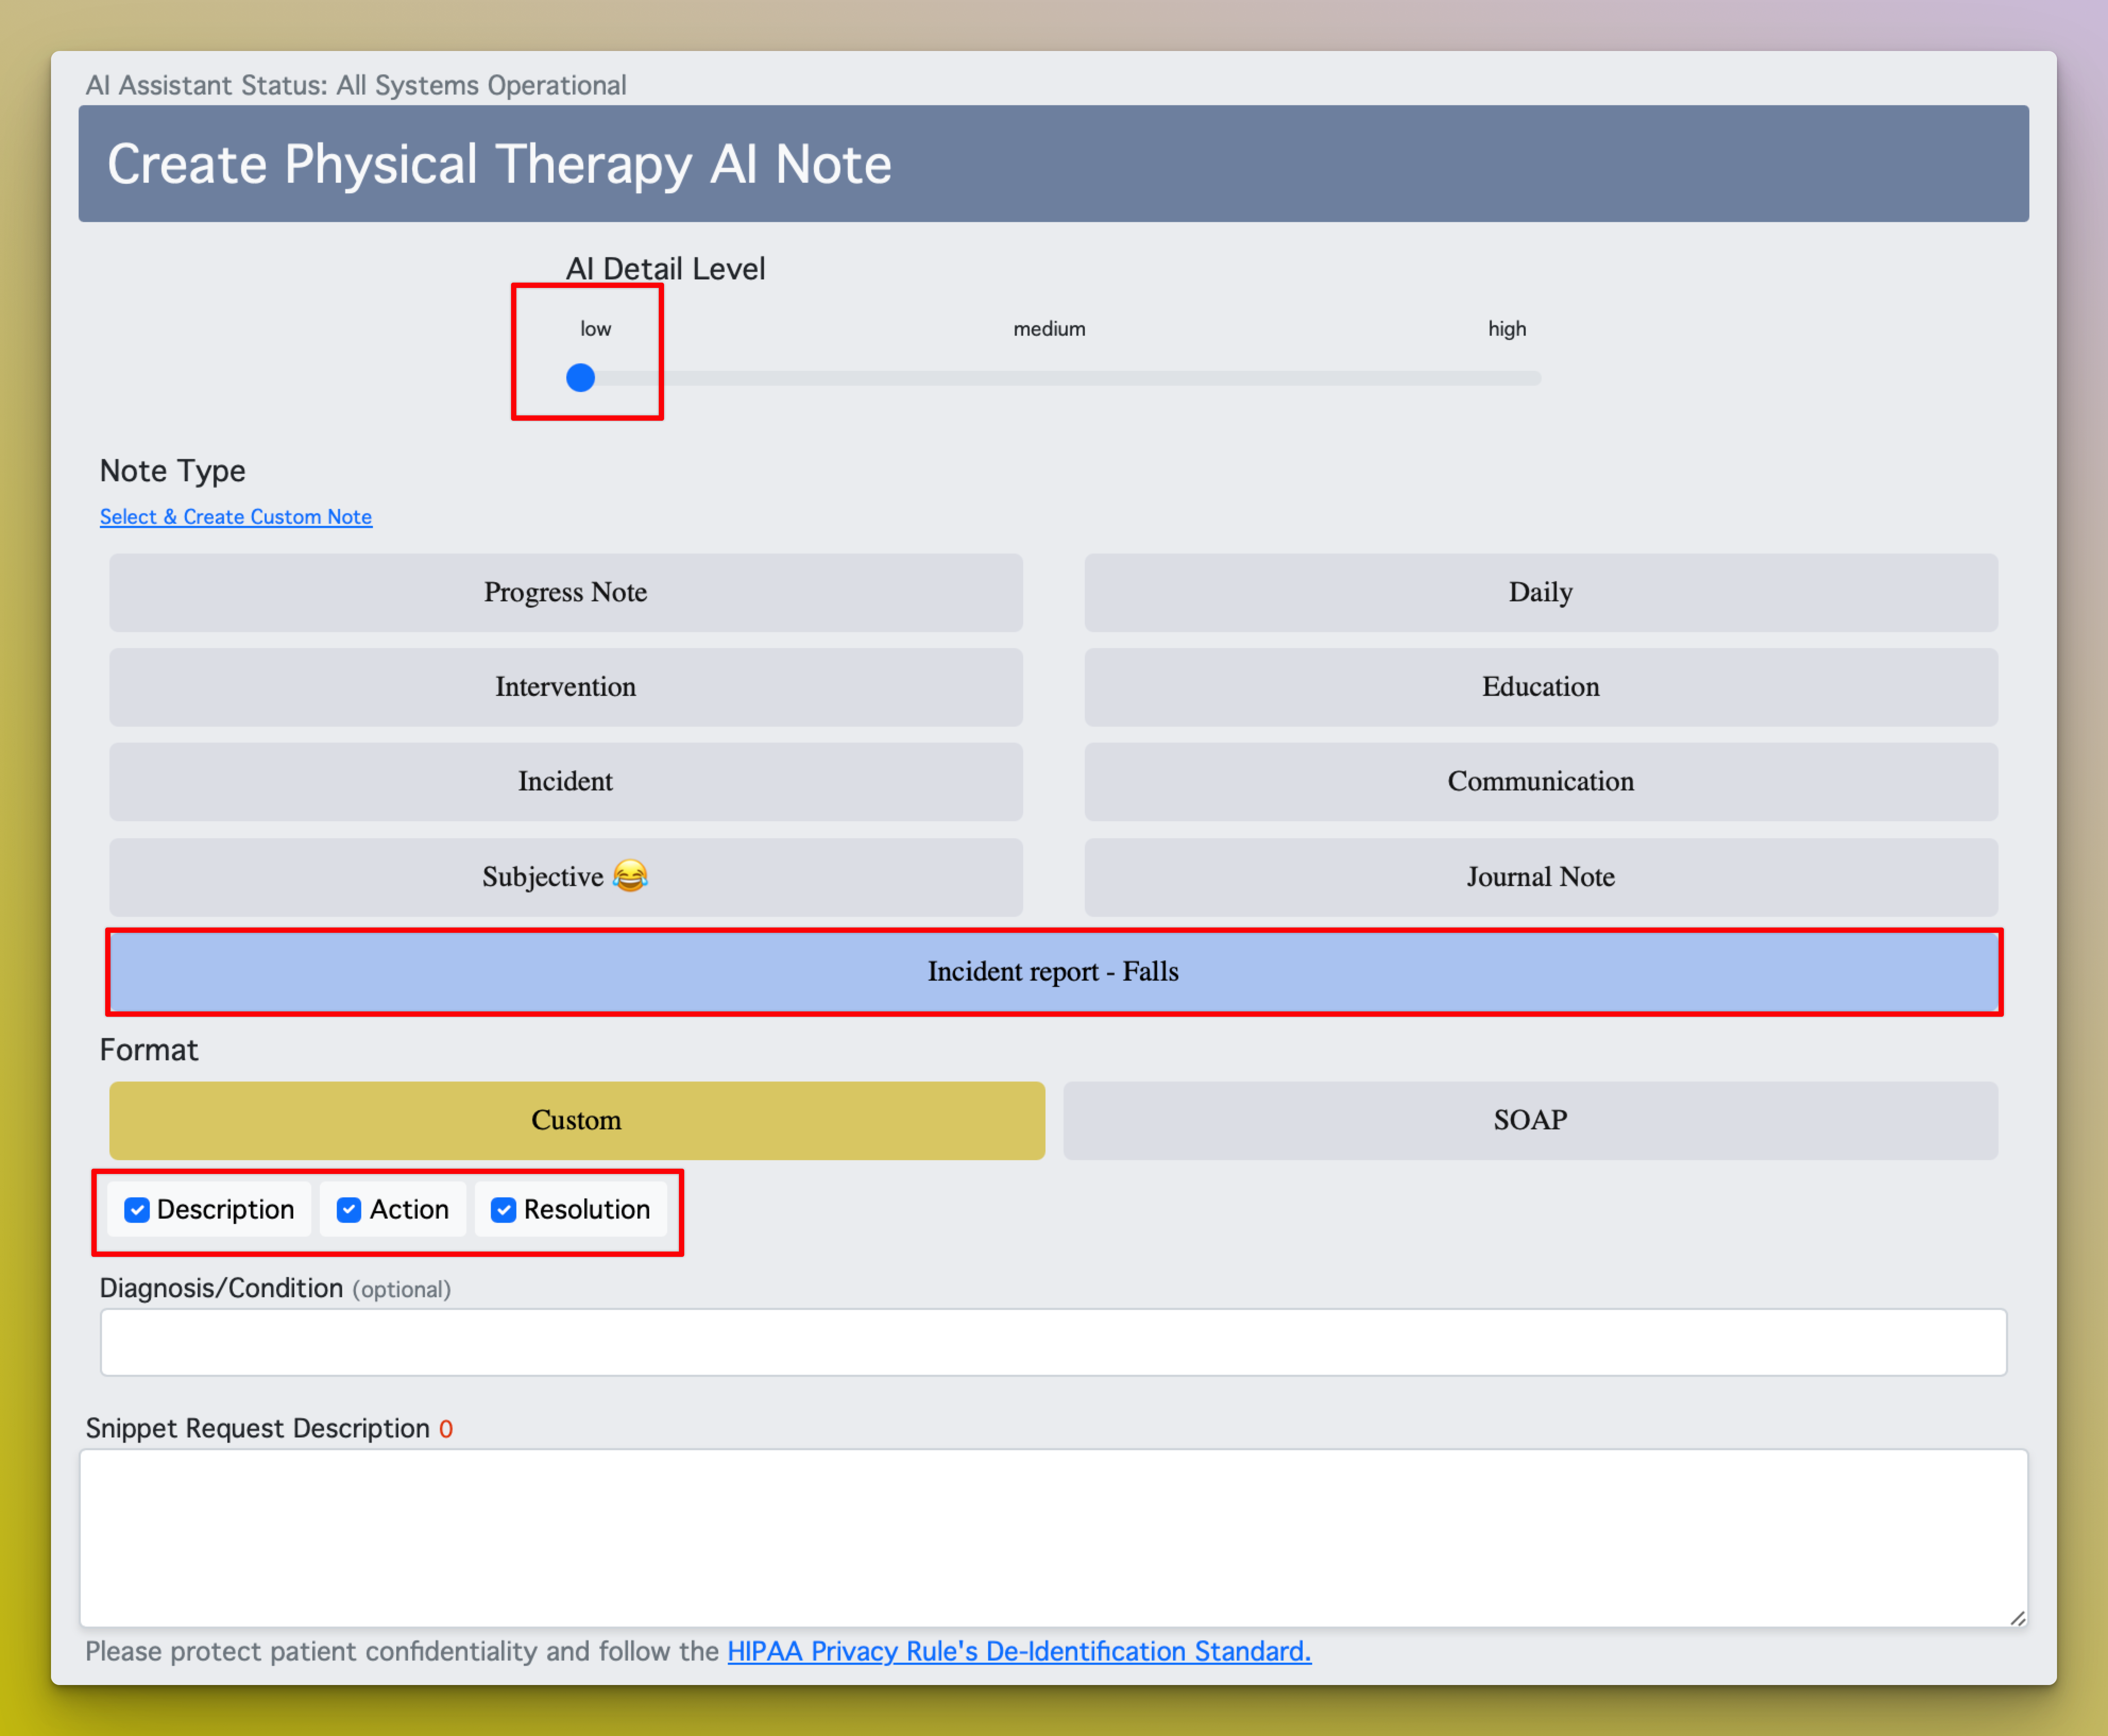
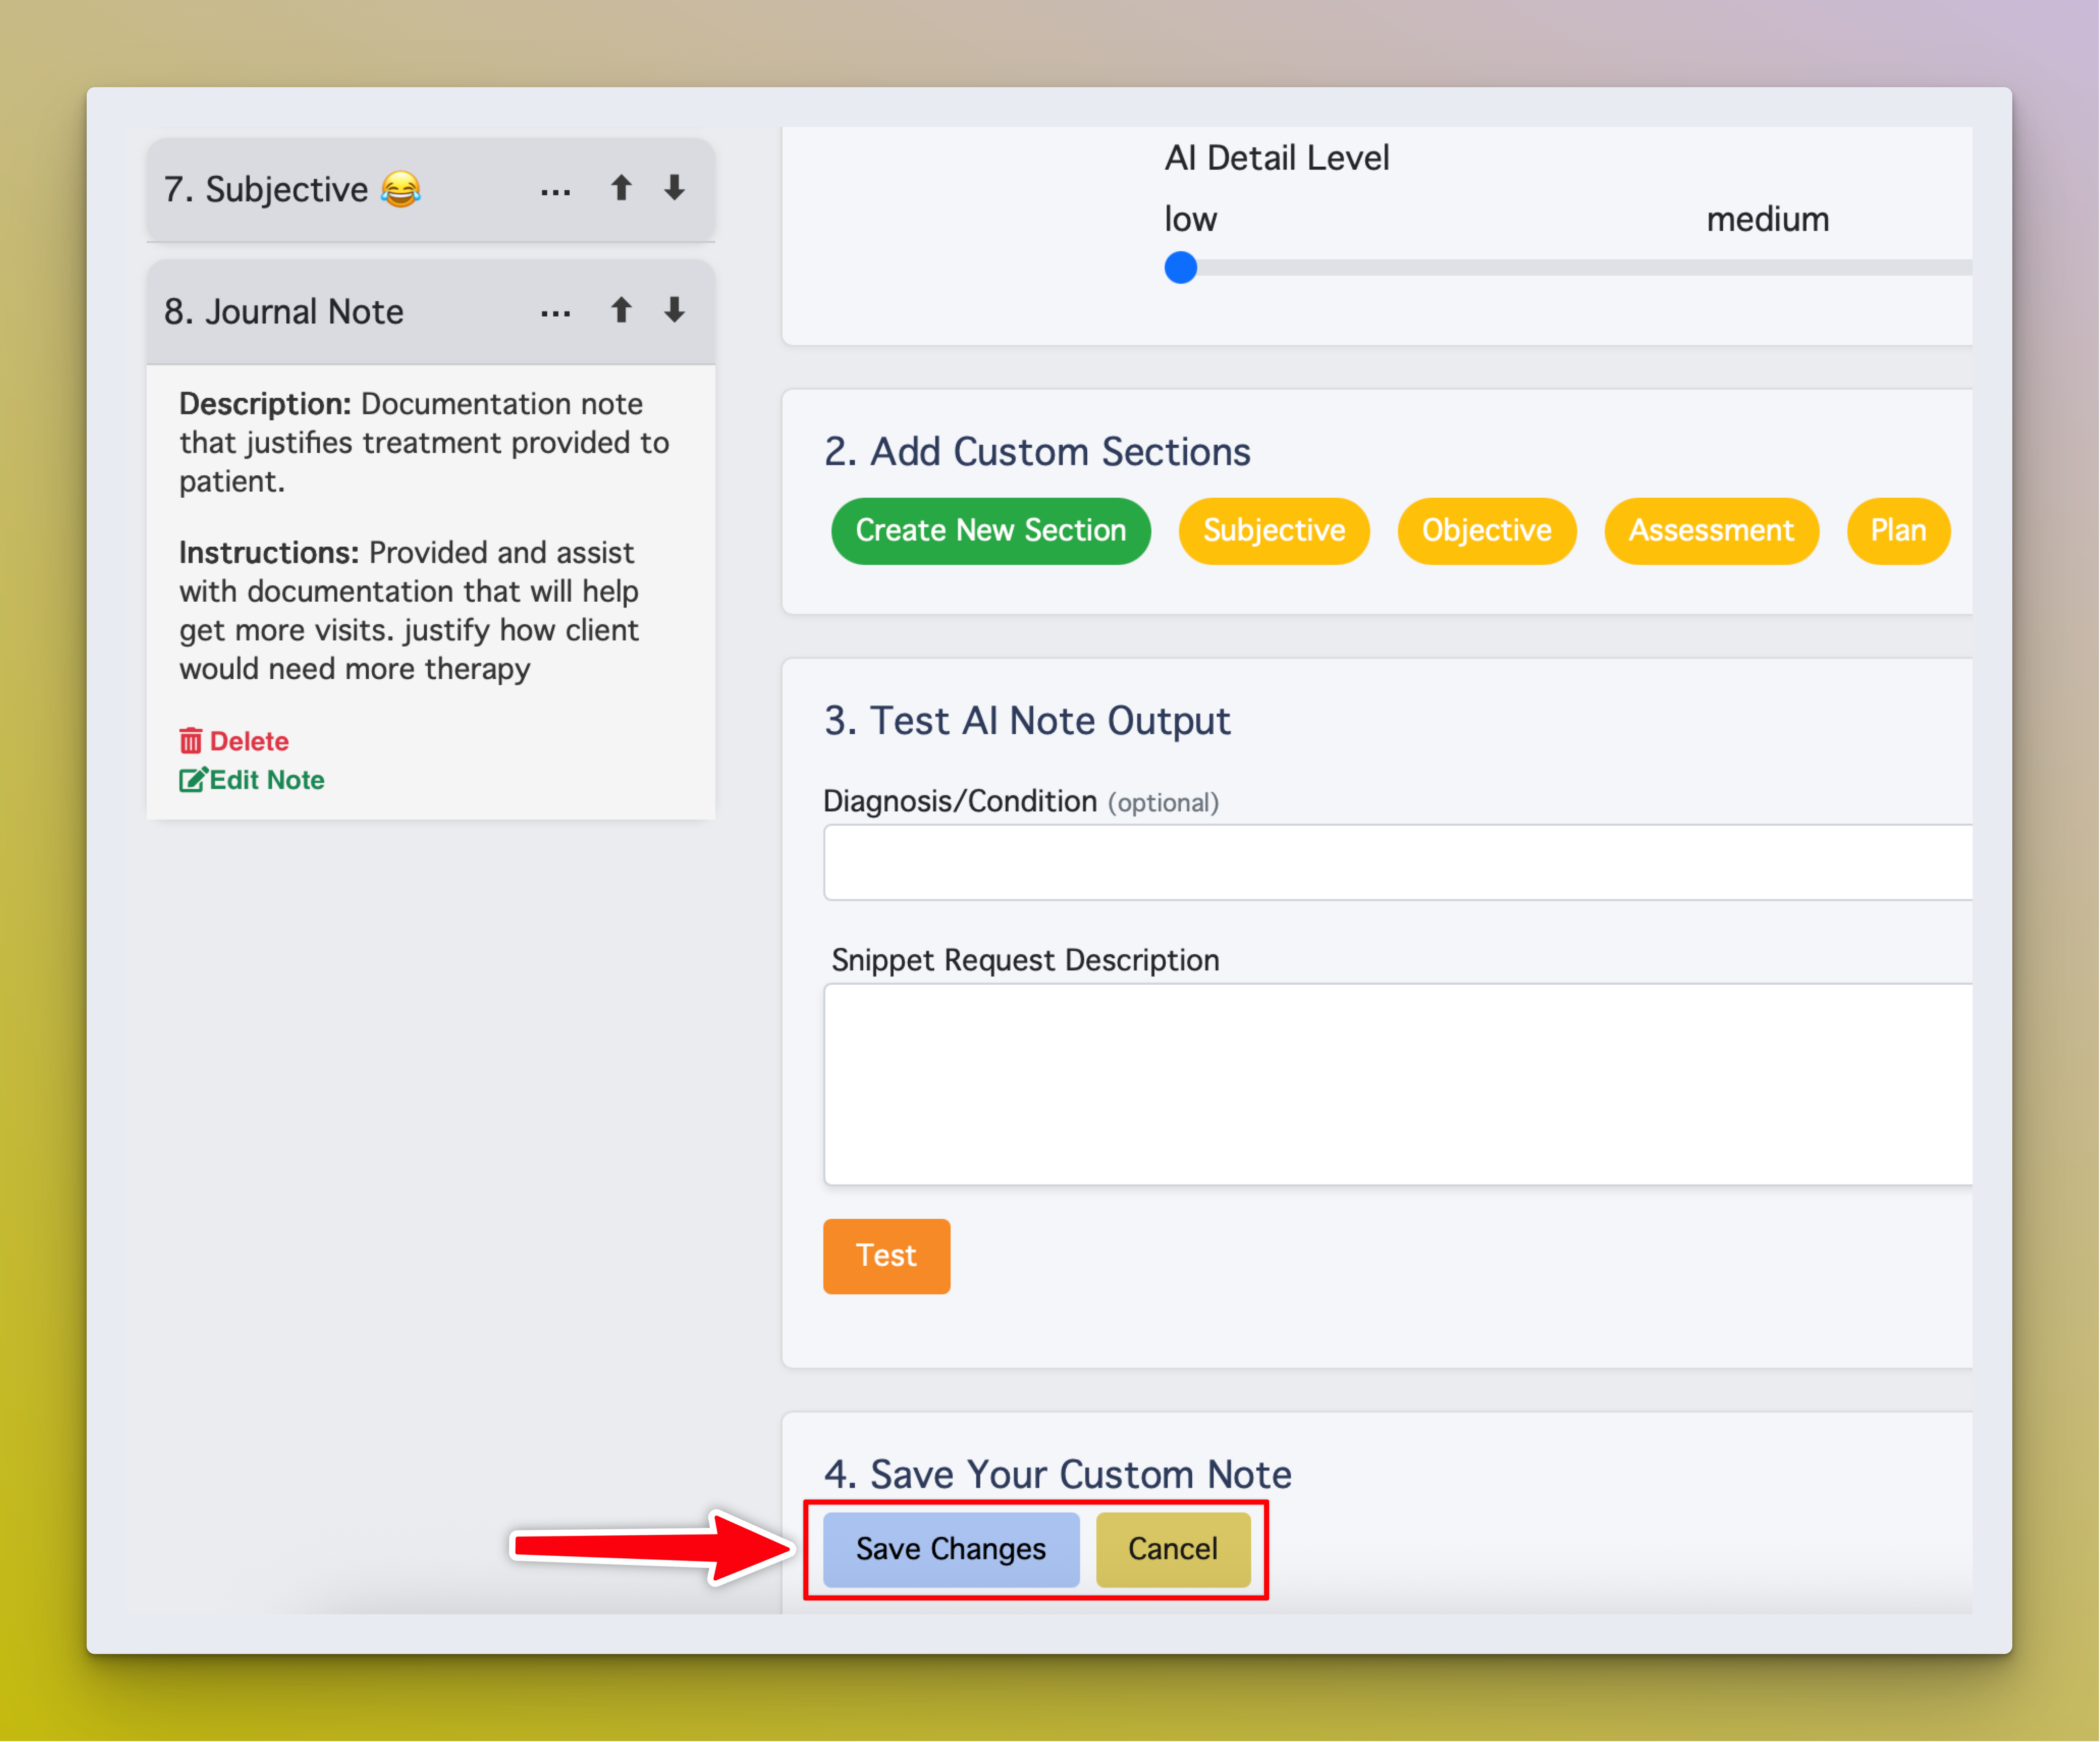
Note Details
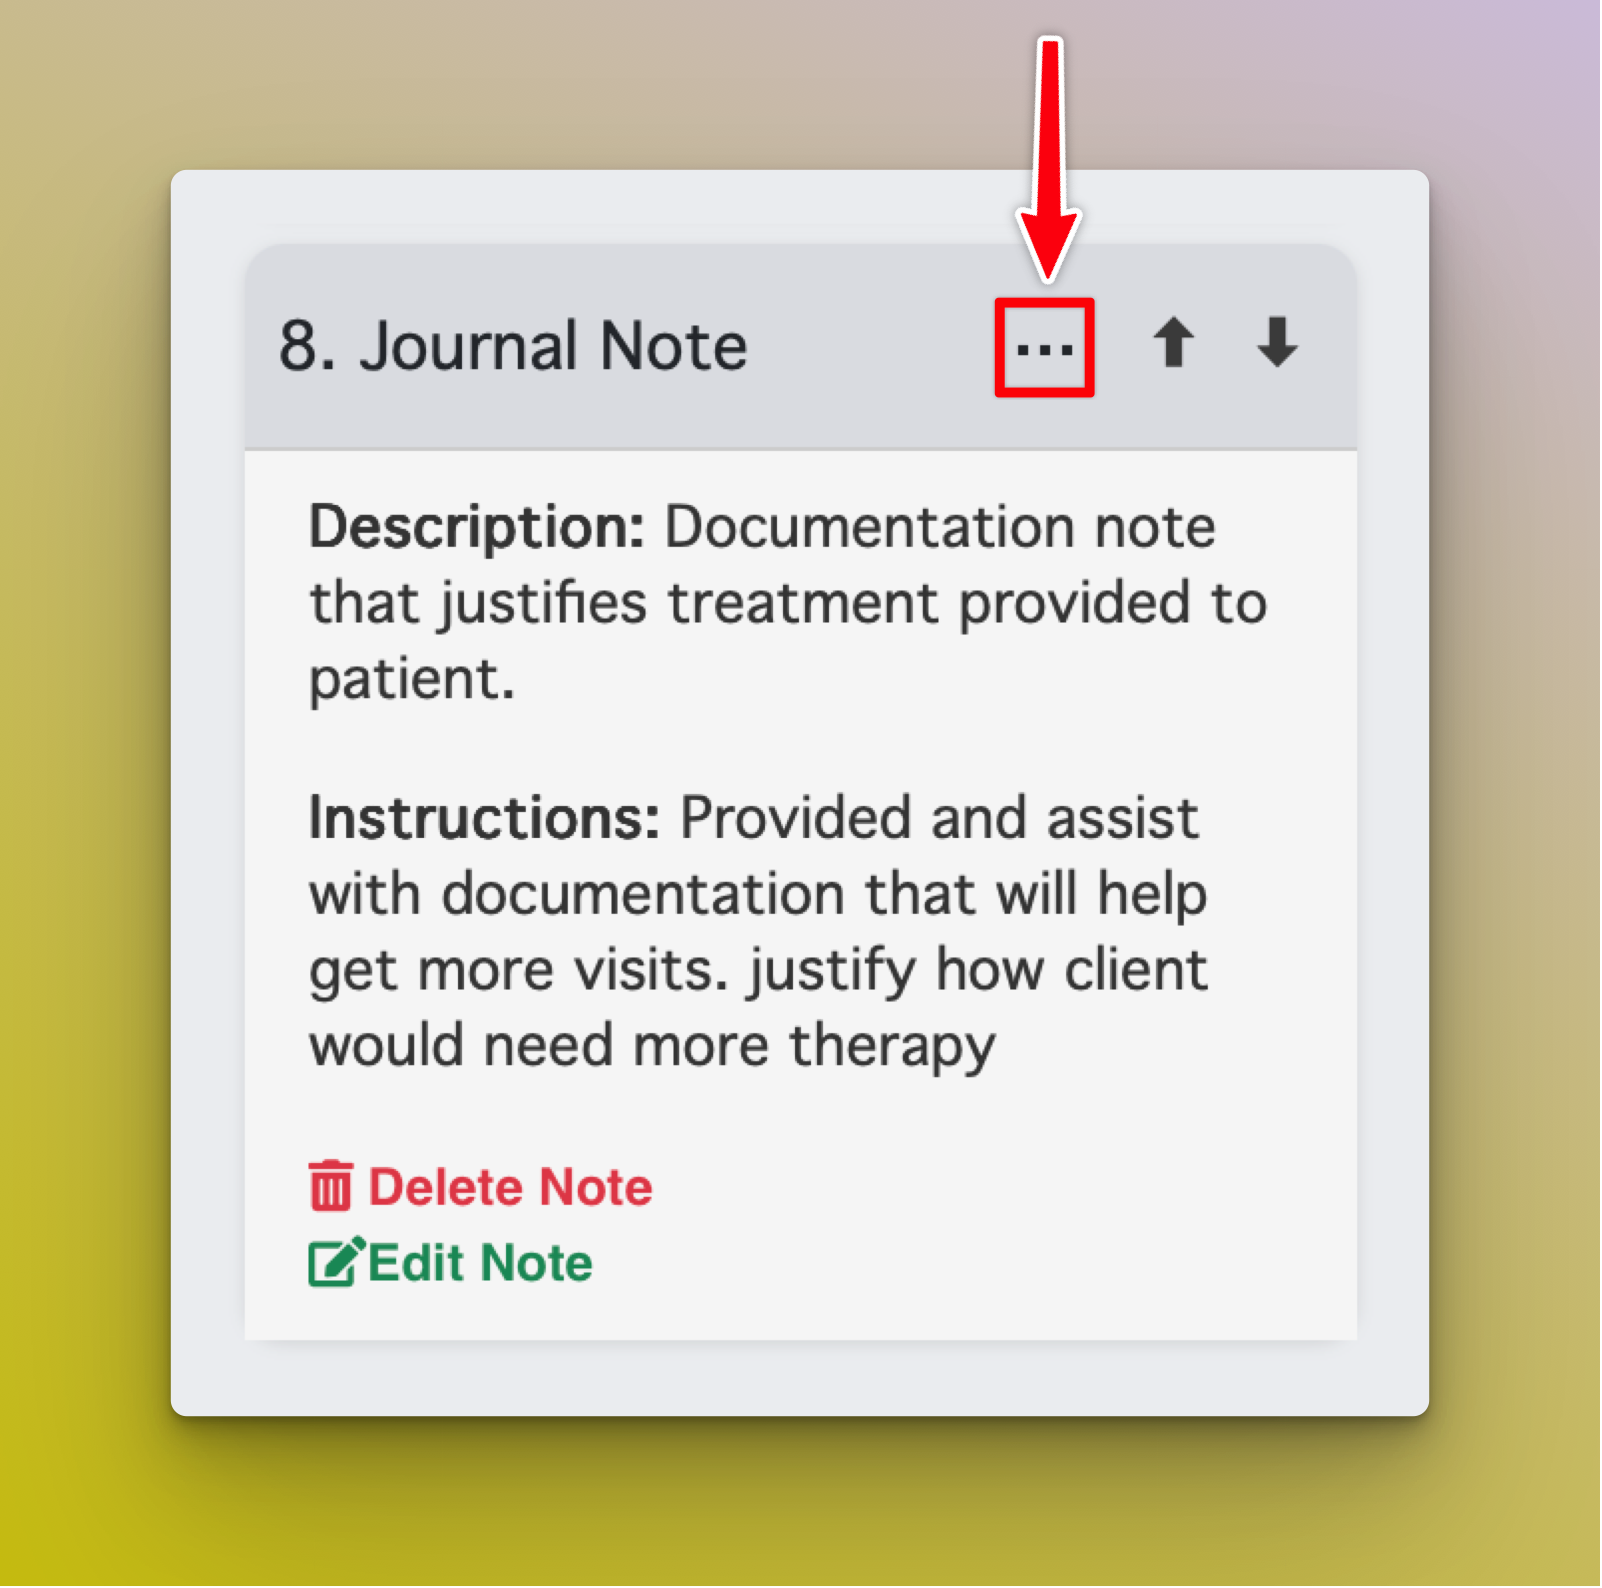
Remove or Delete Notes
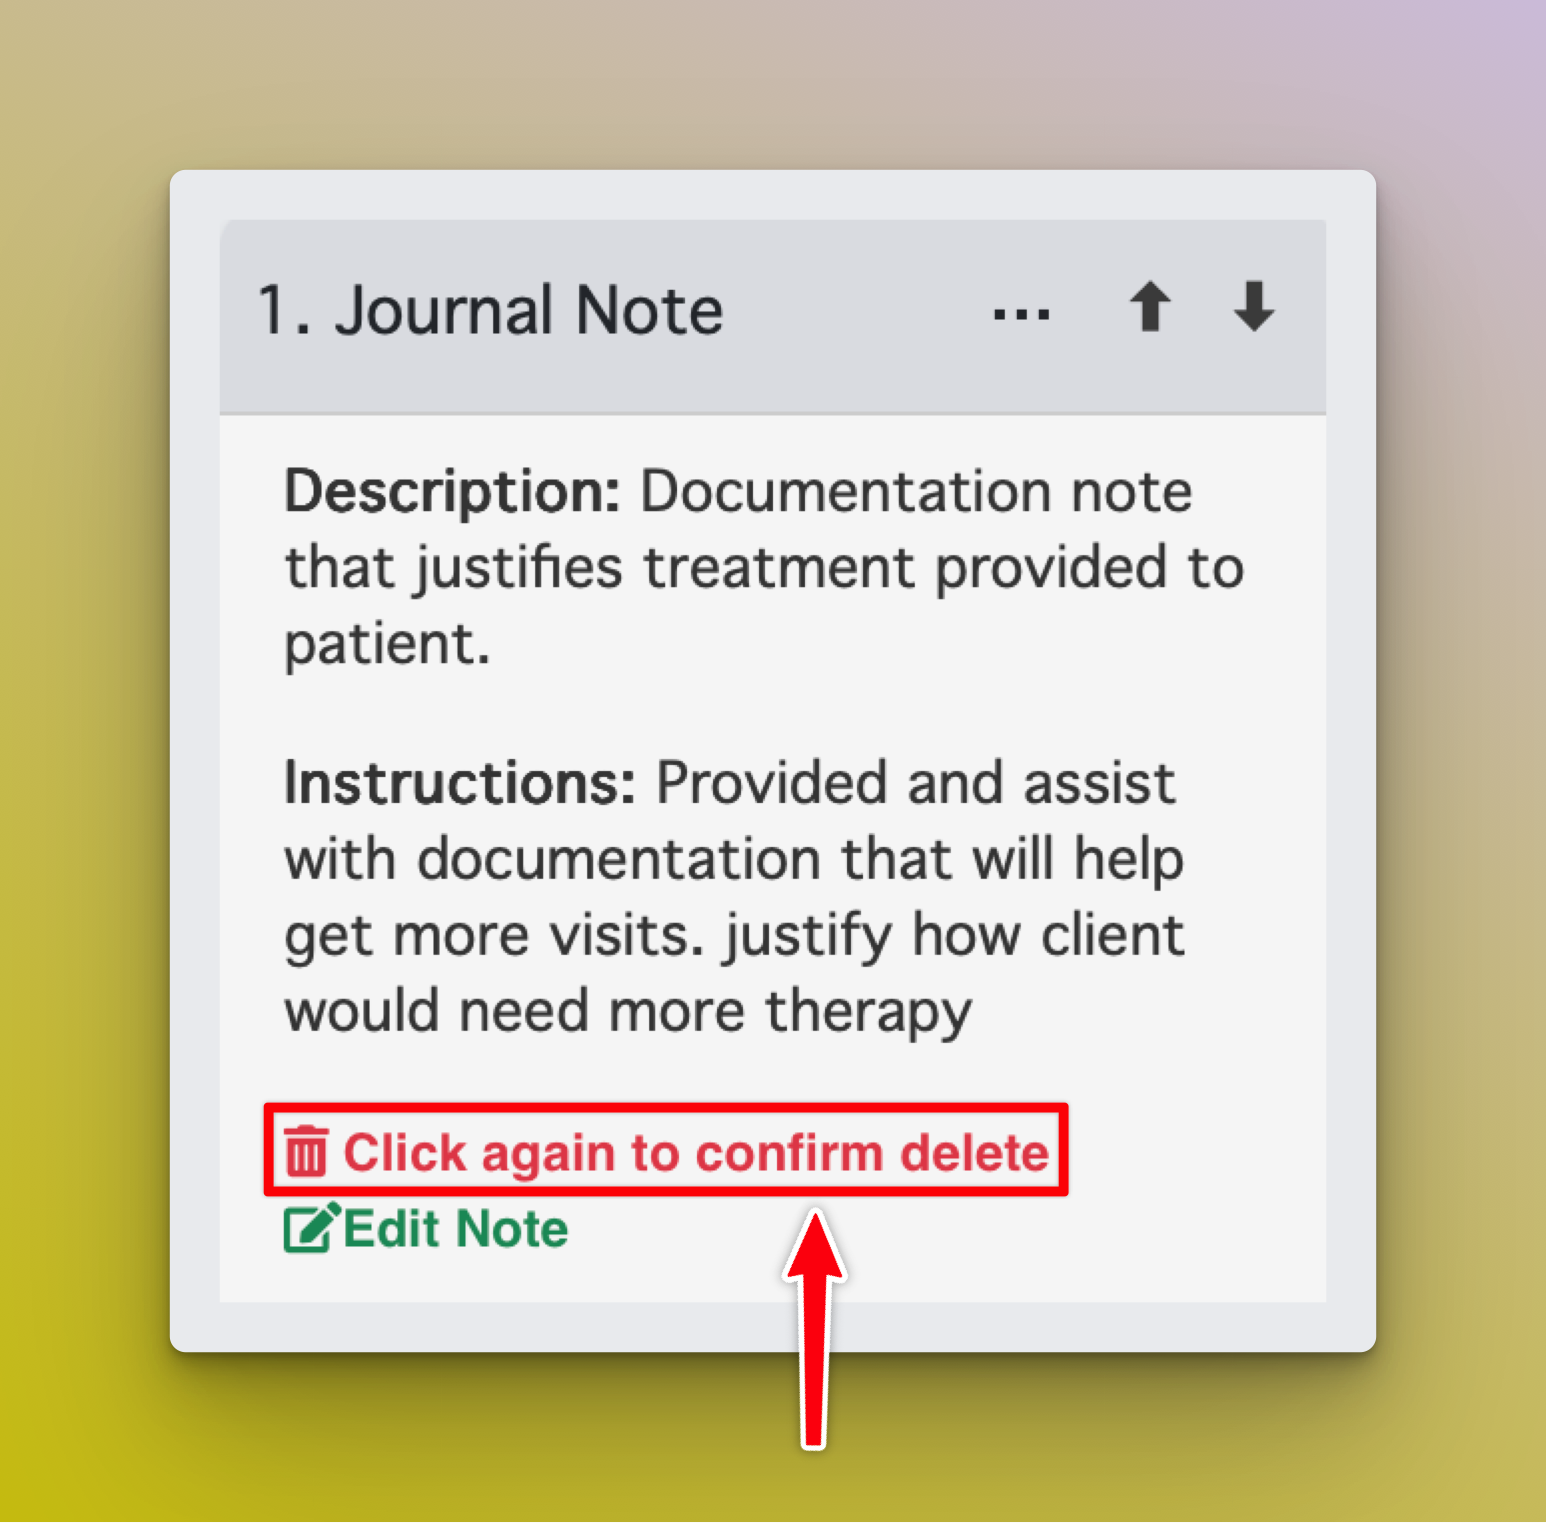
Notes you created will be permanently deleted if removed here. Edit Notes
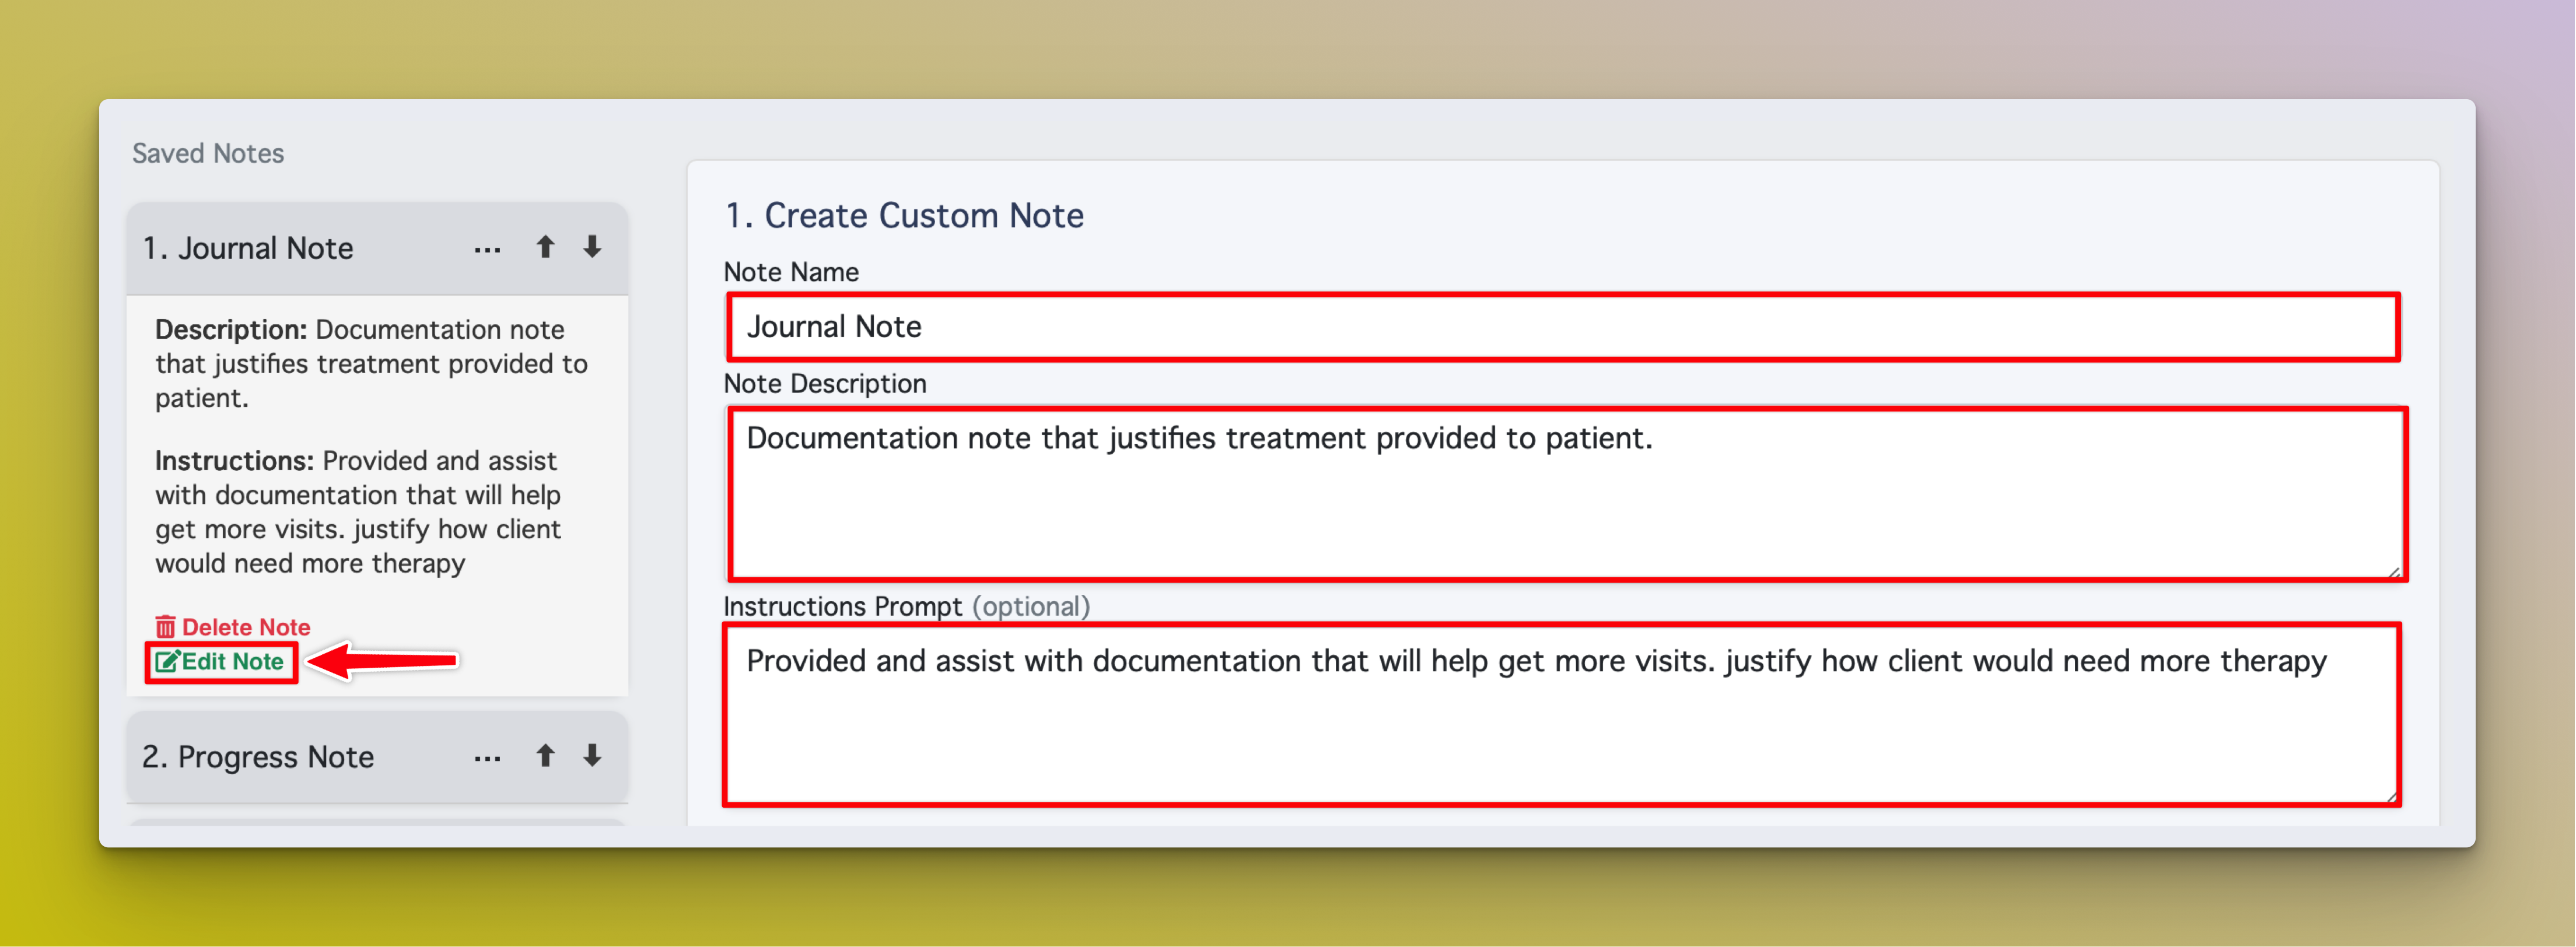
You can only edit notes you created.