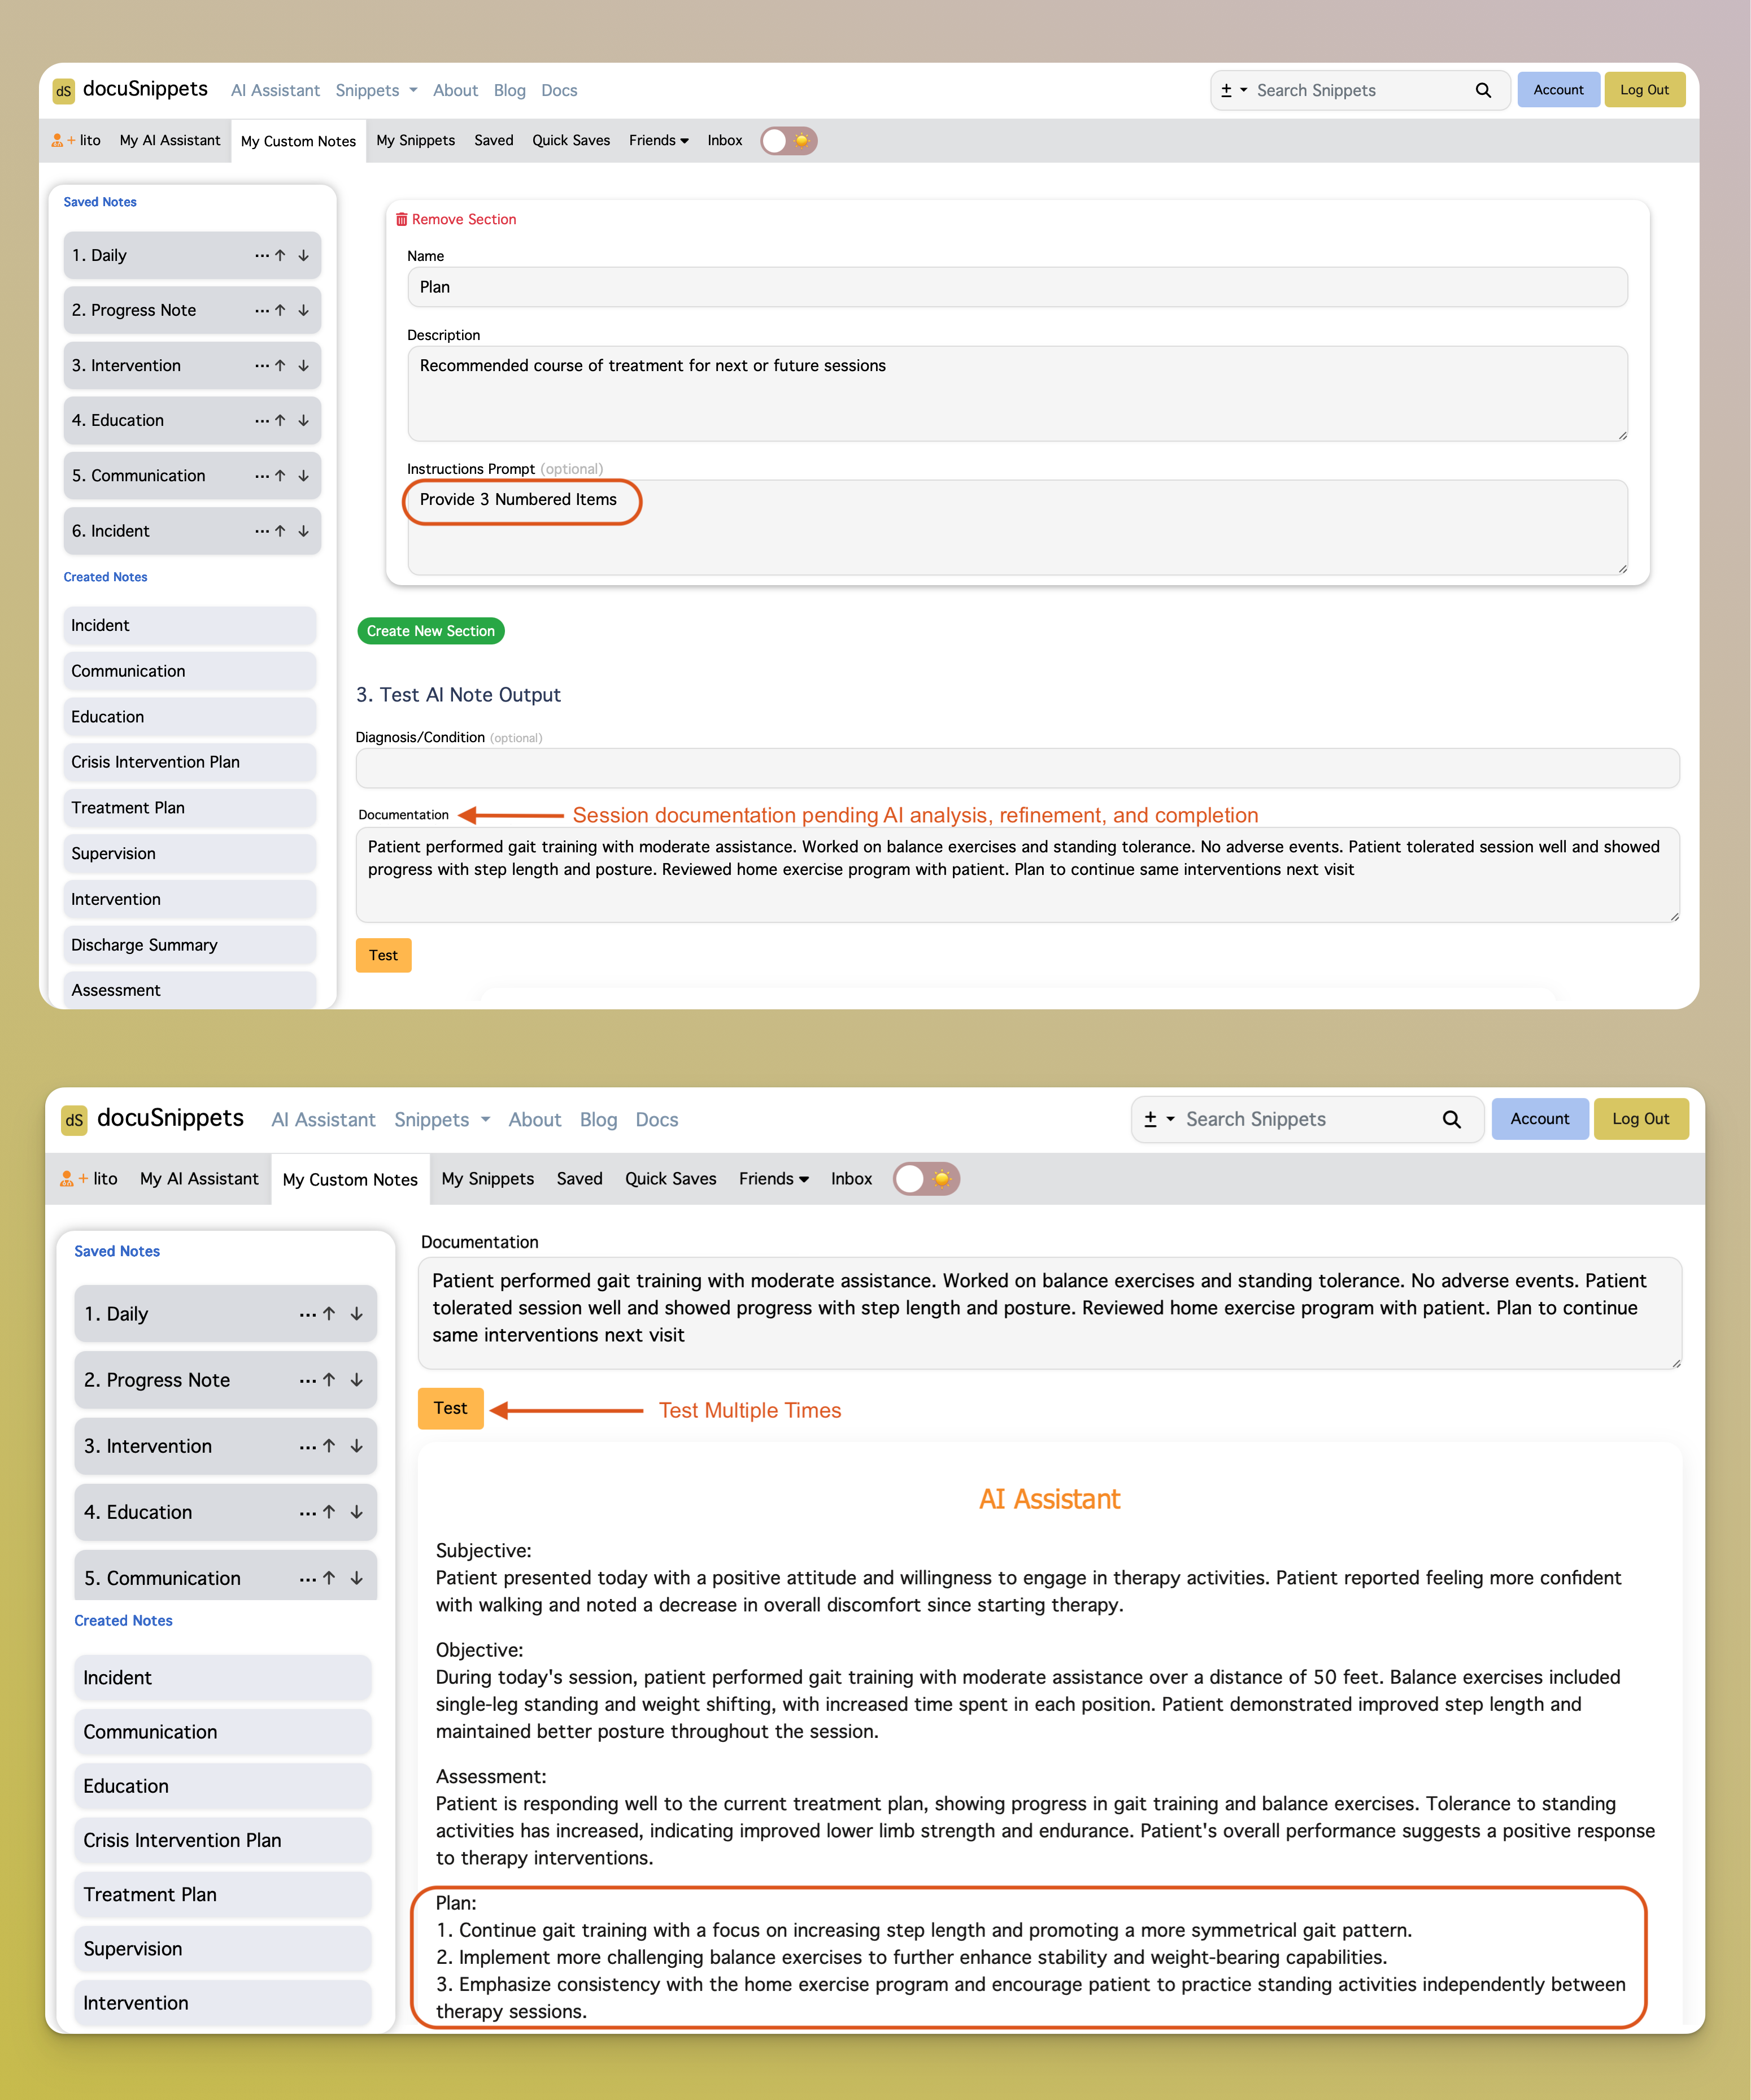
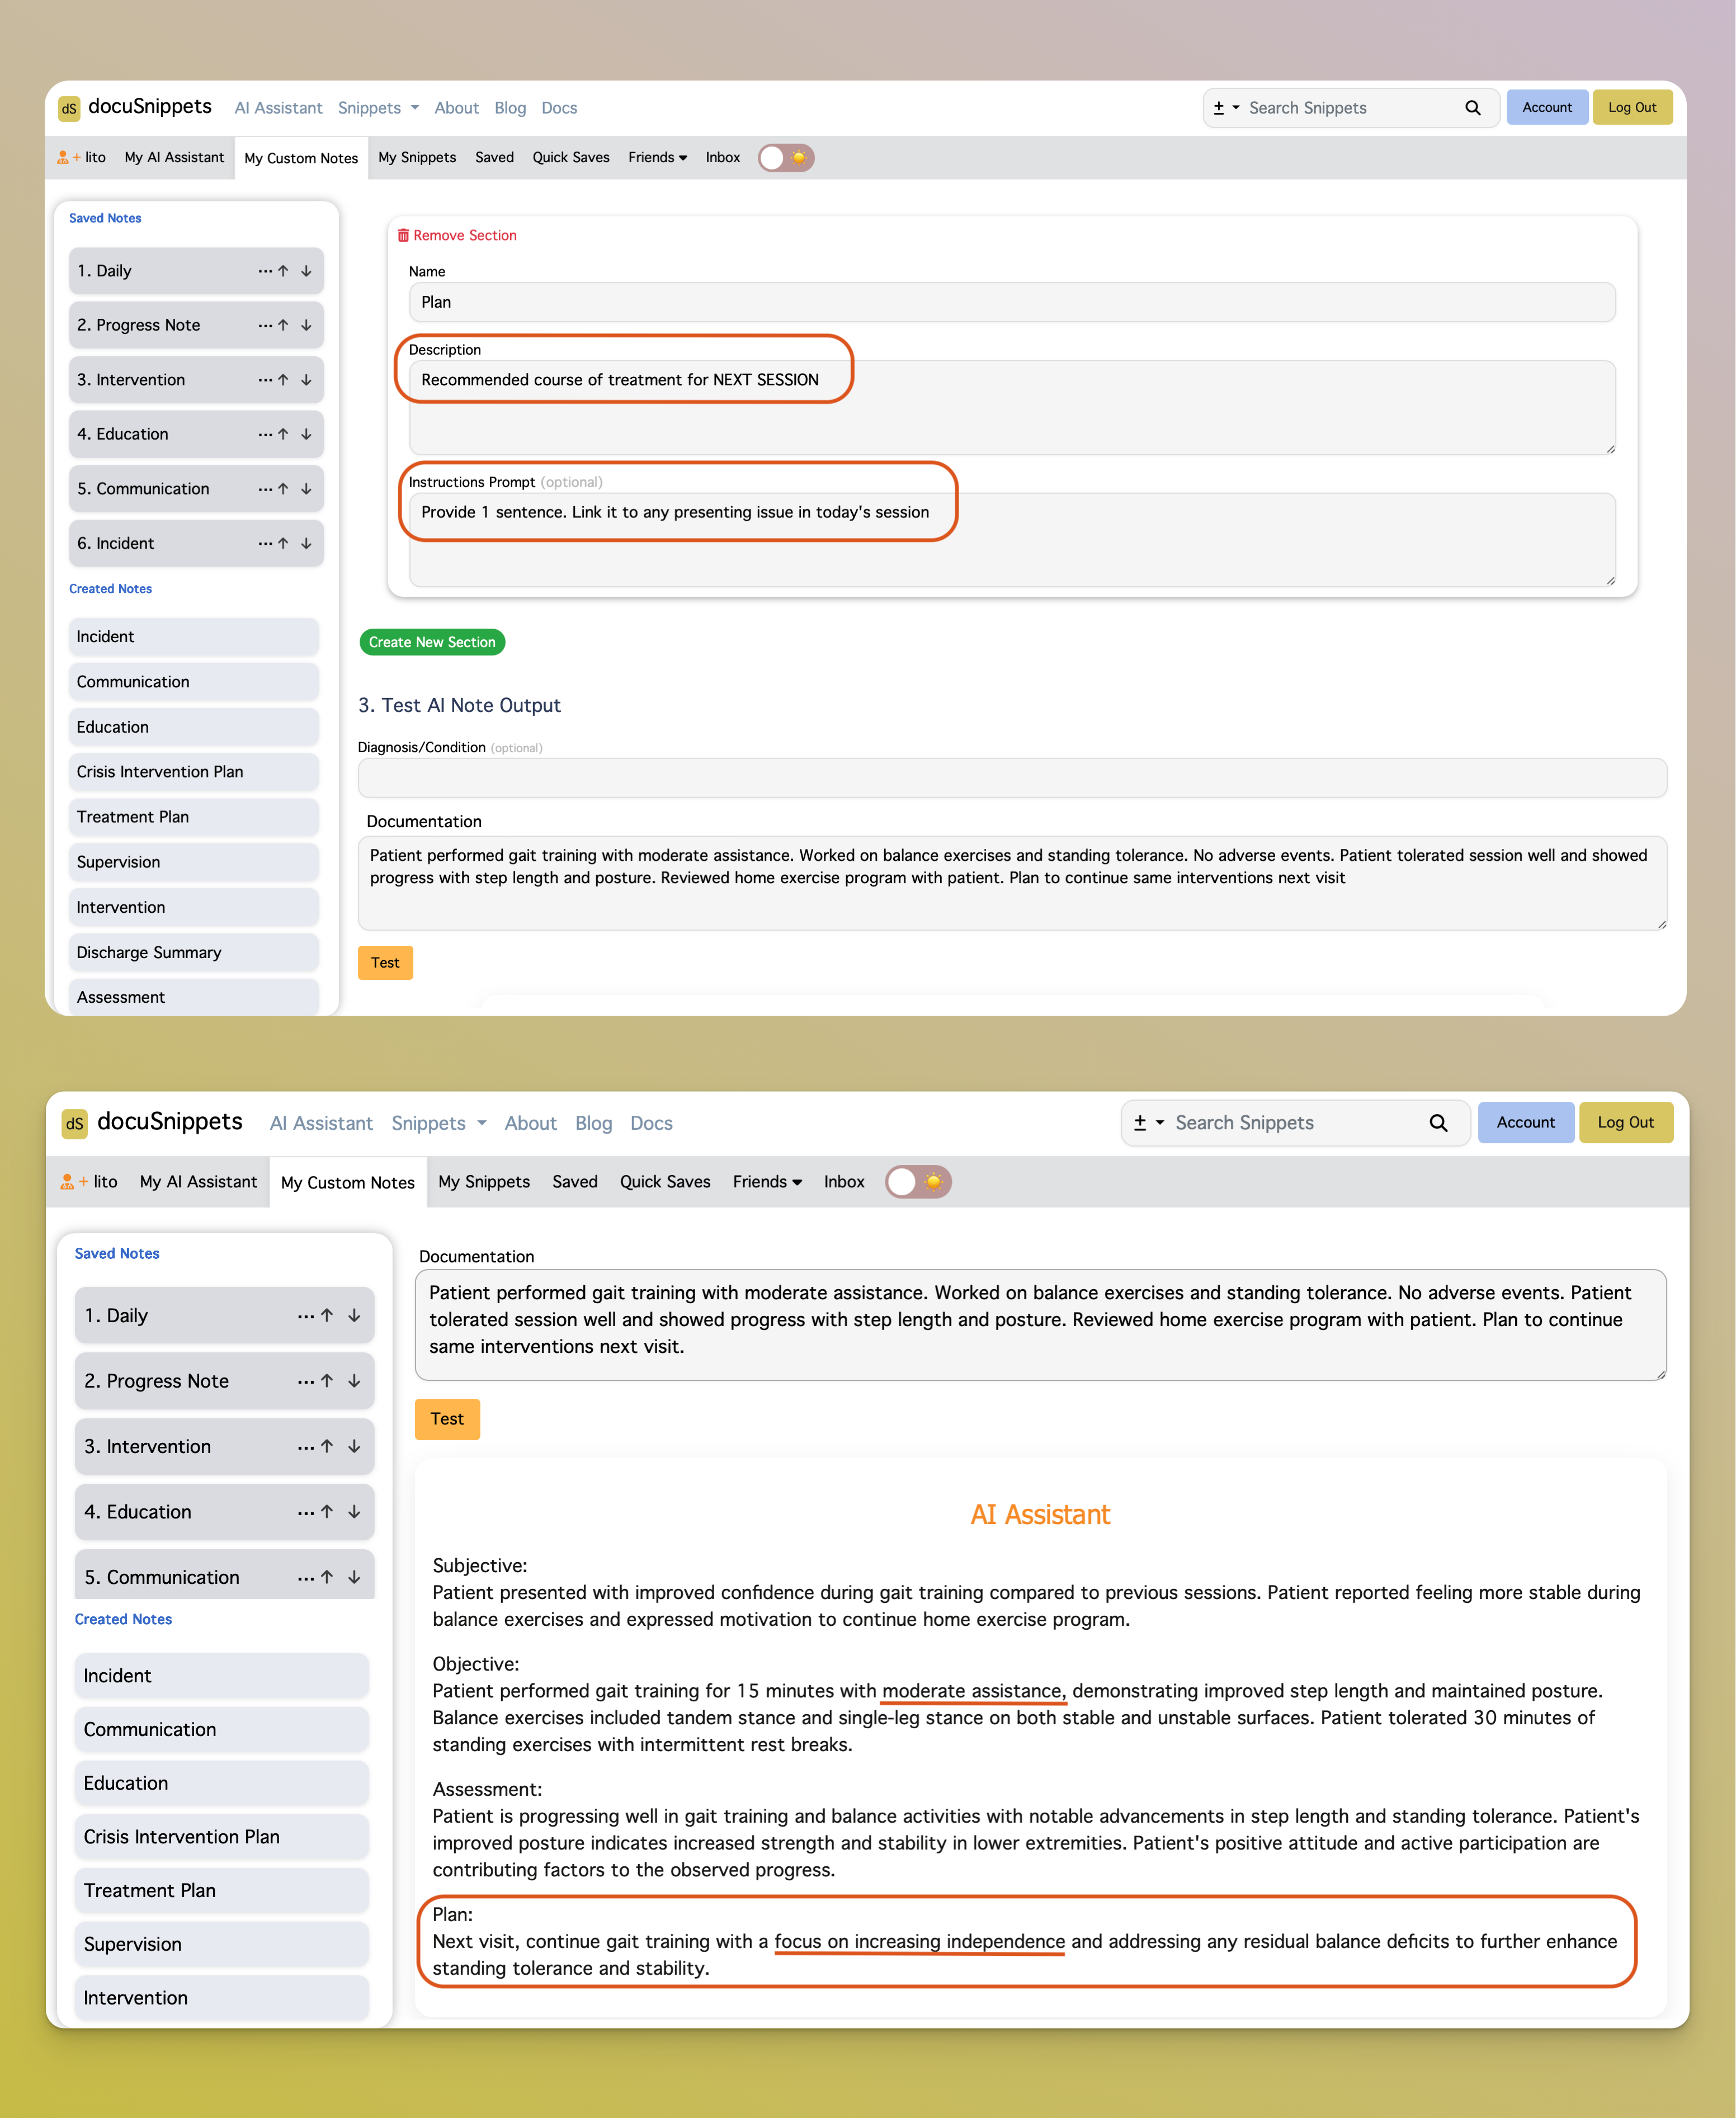
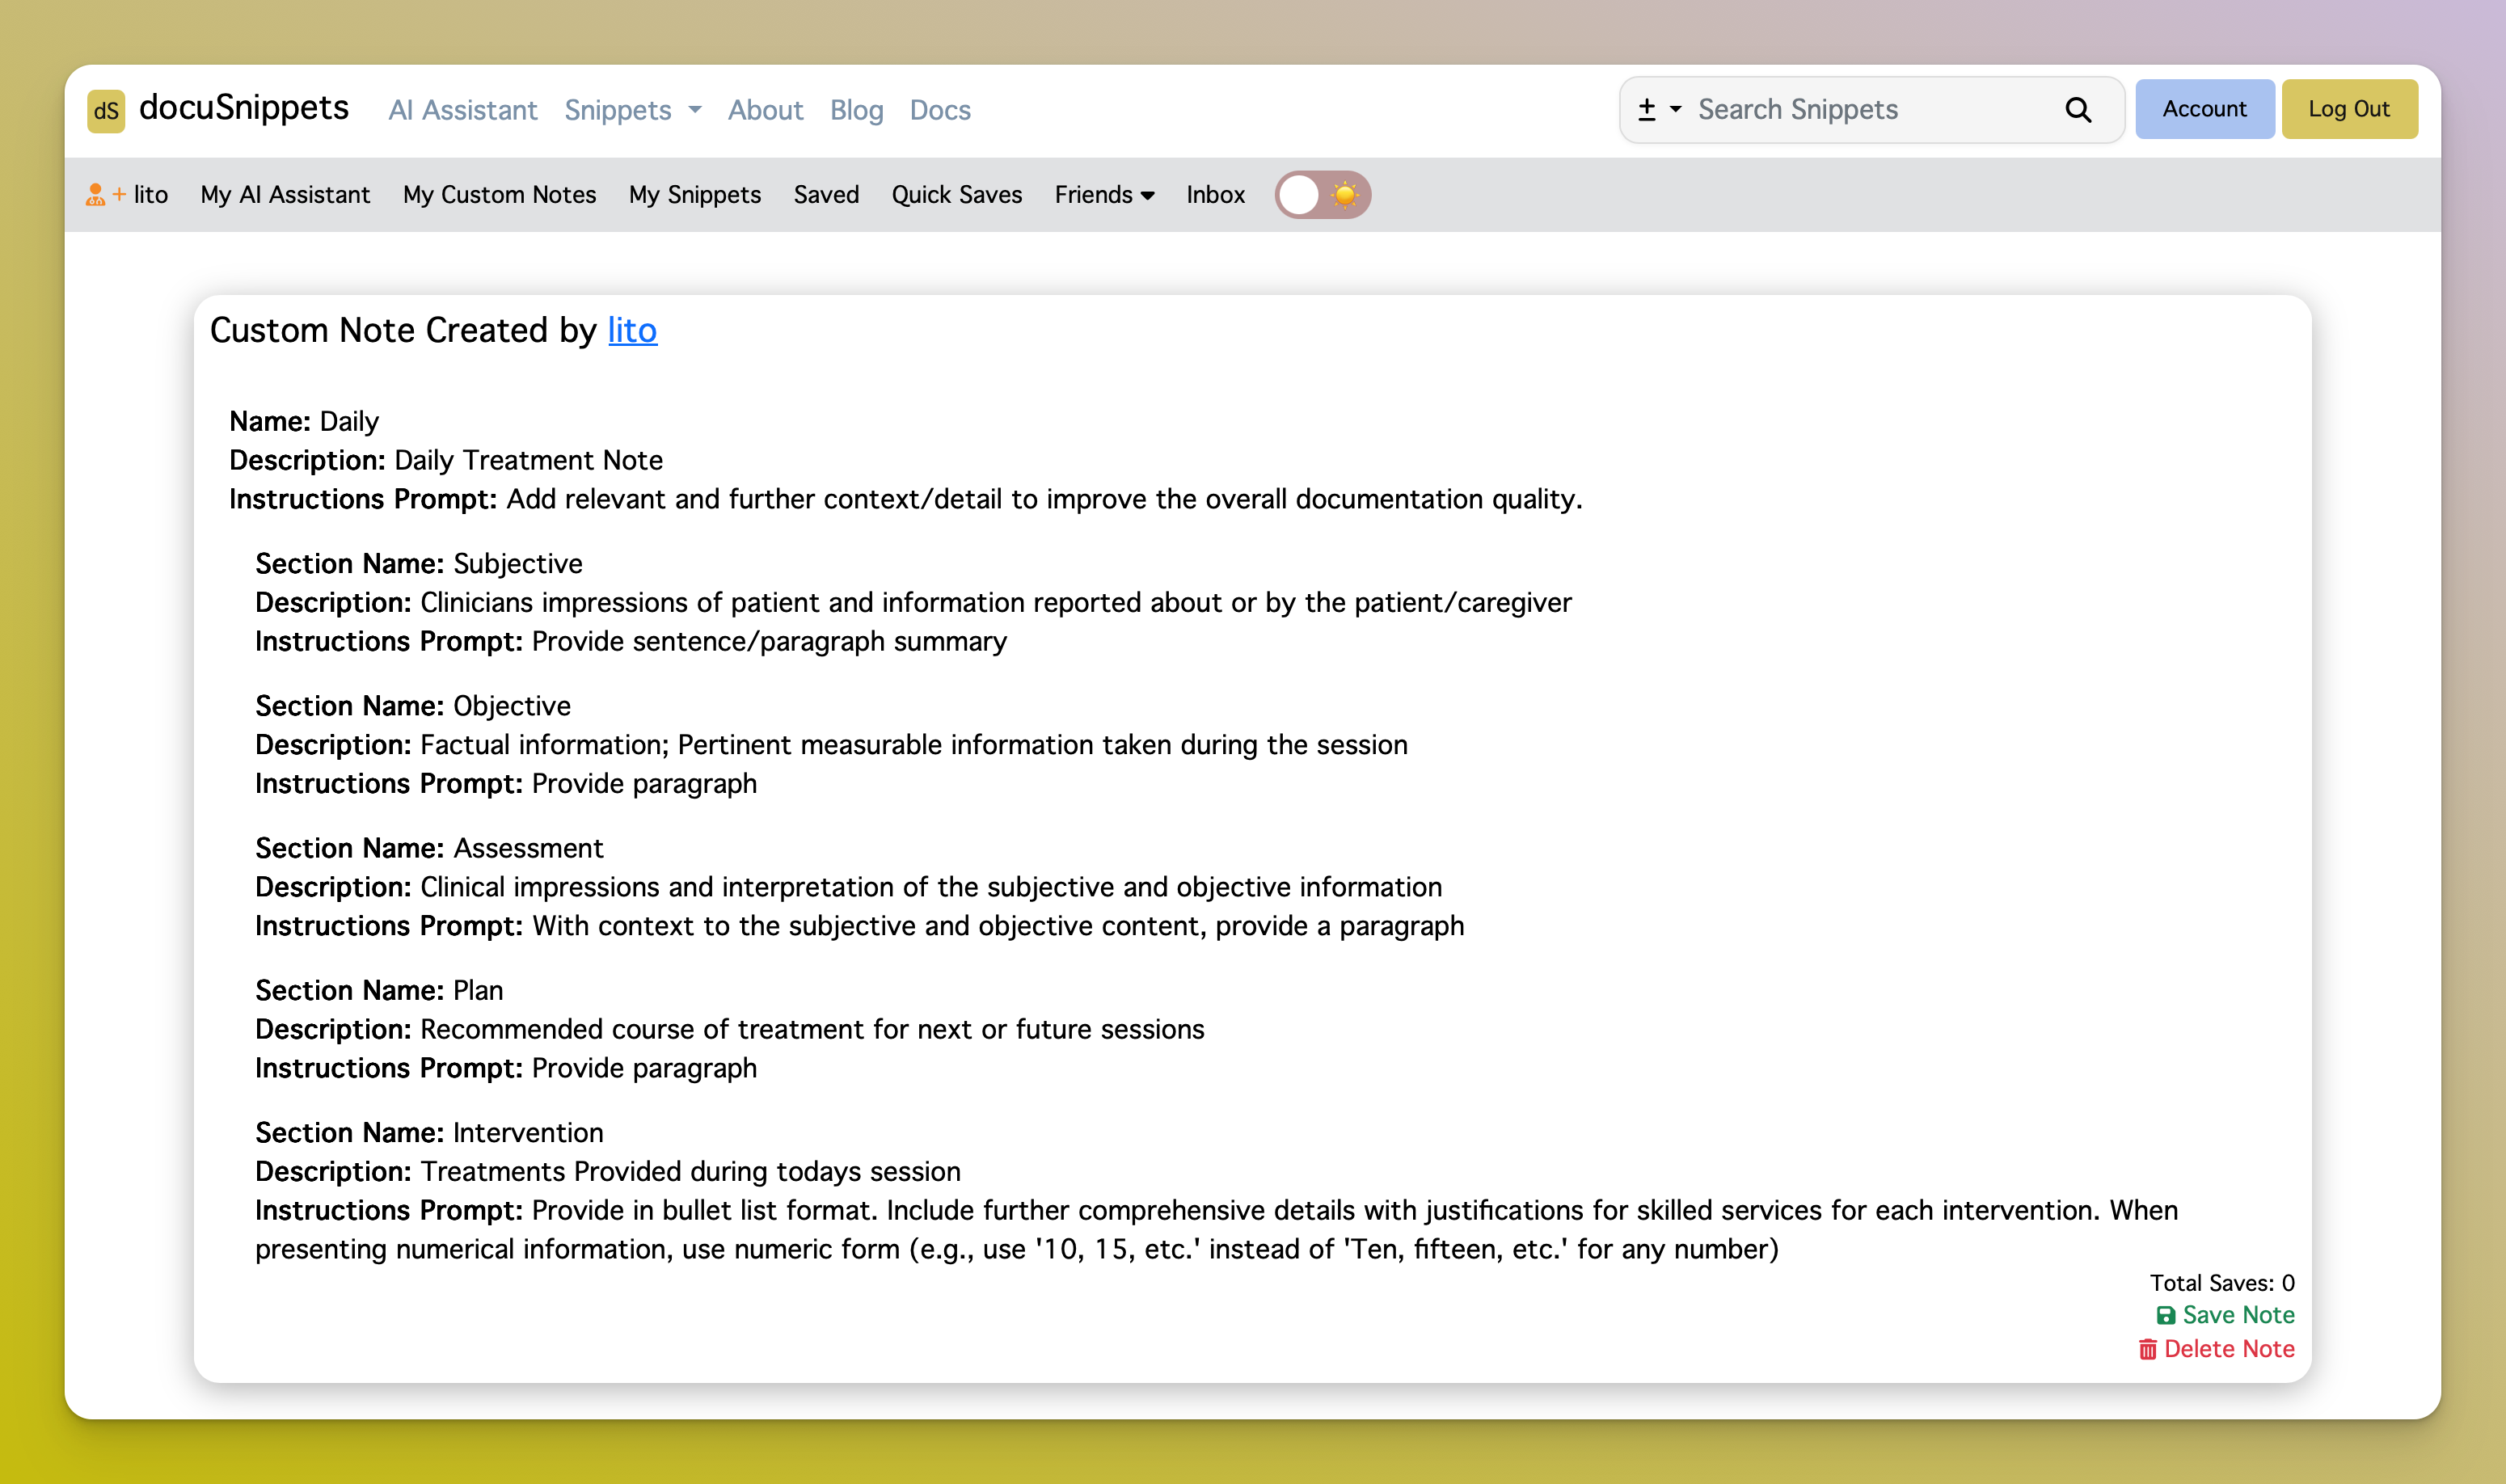
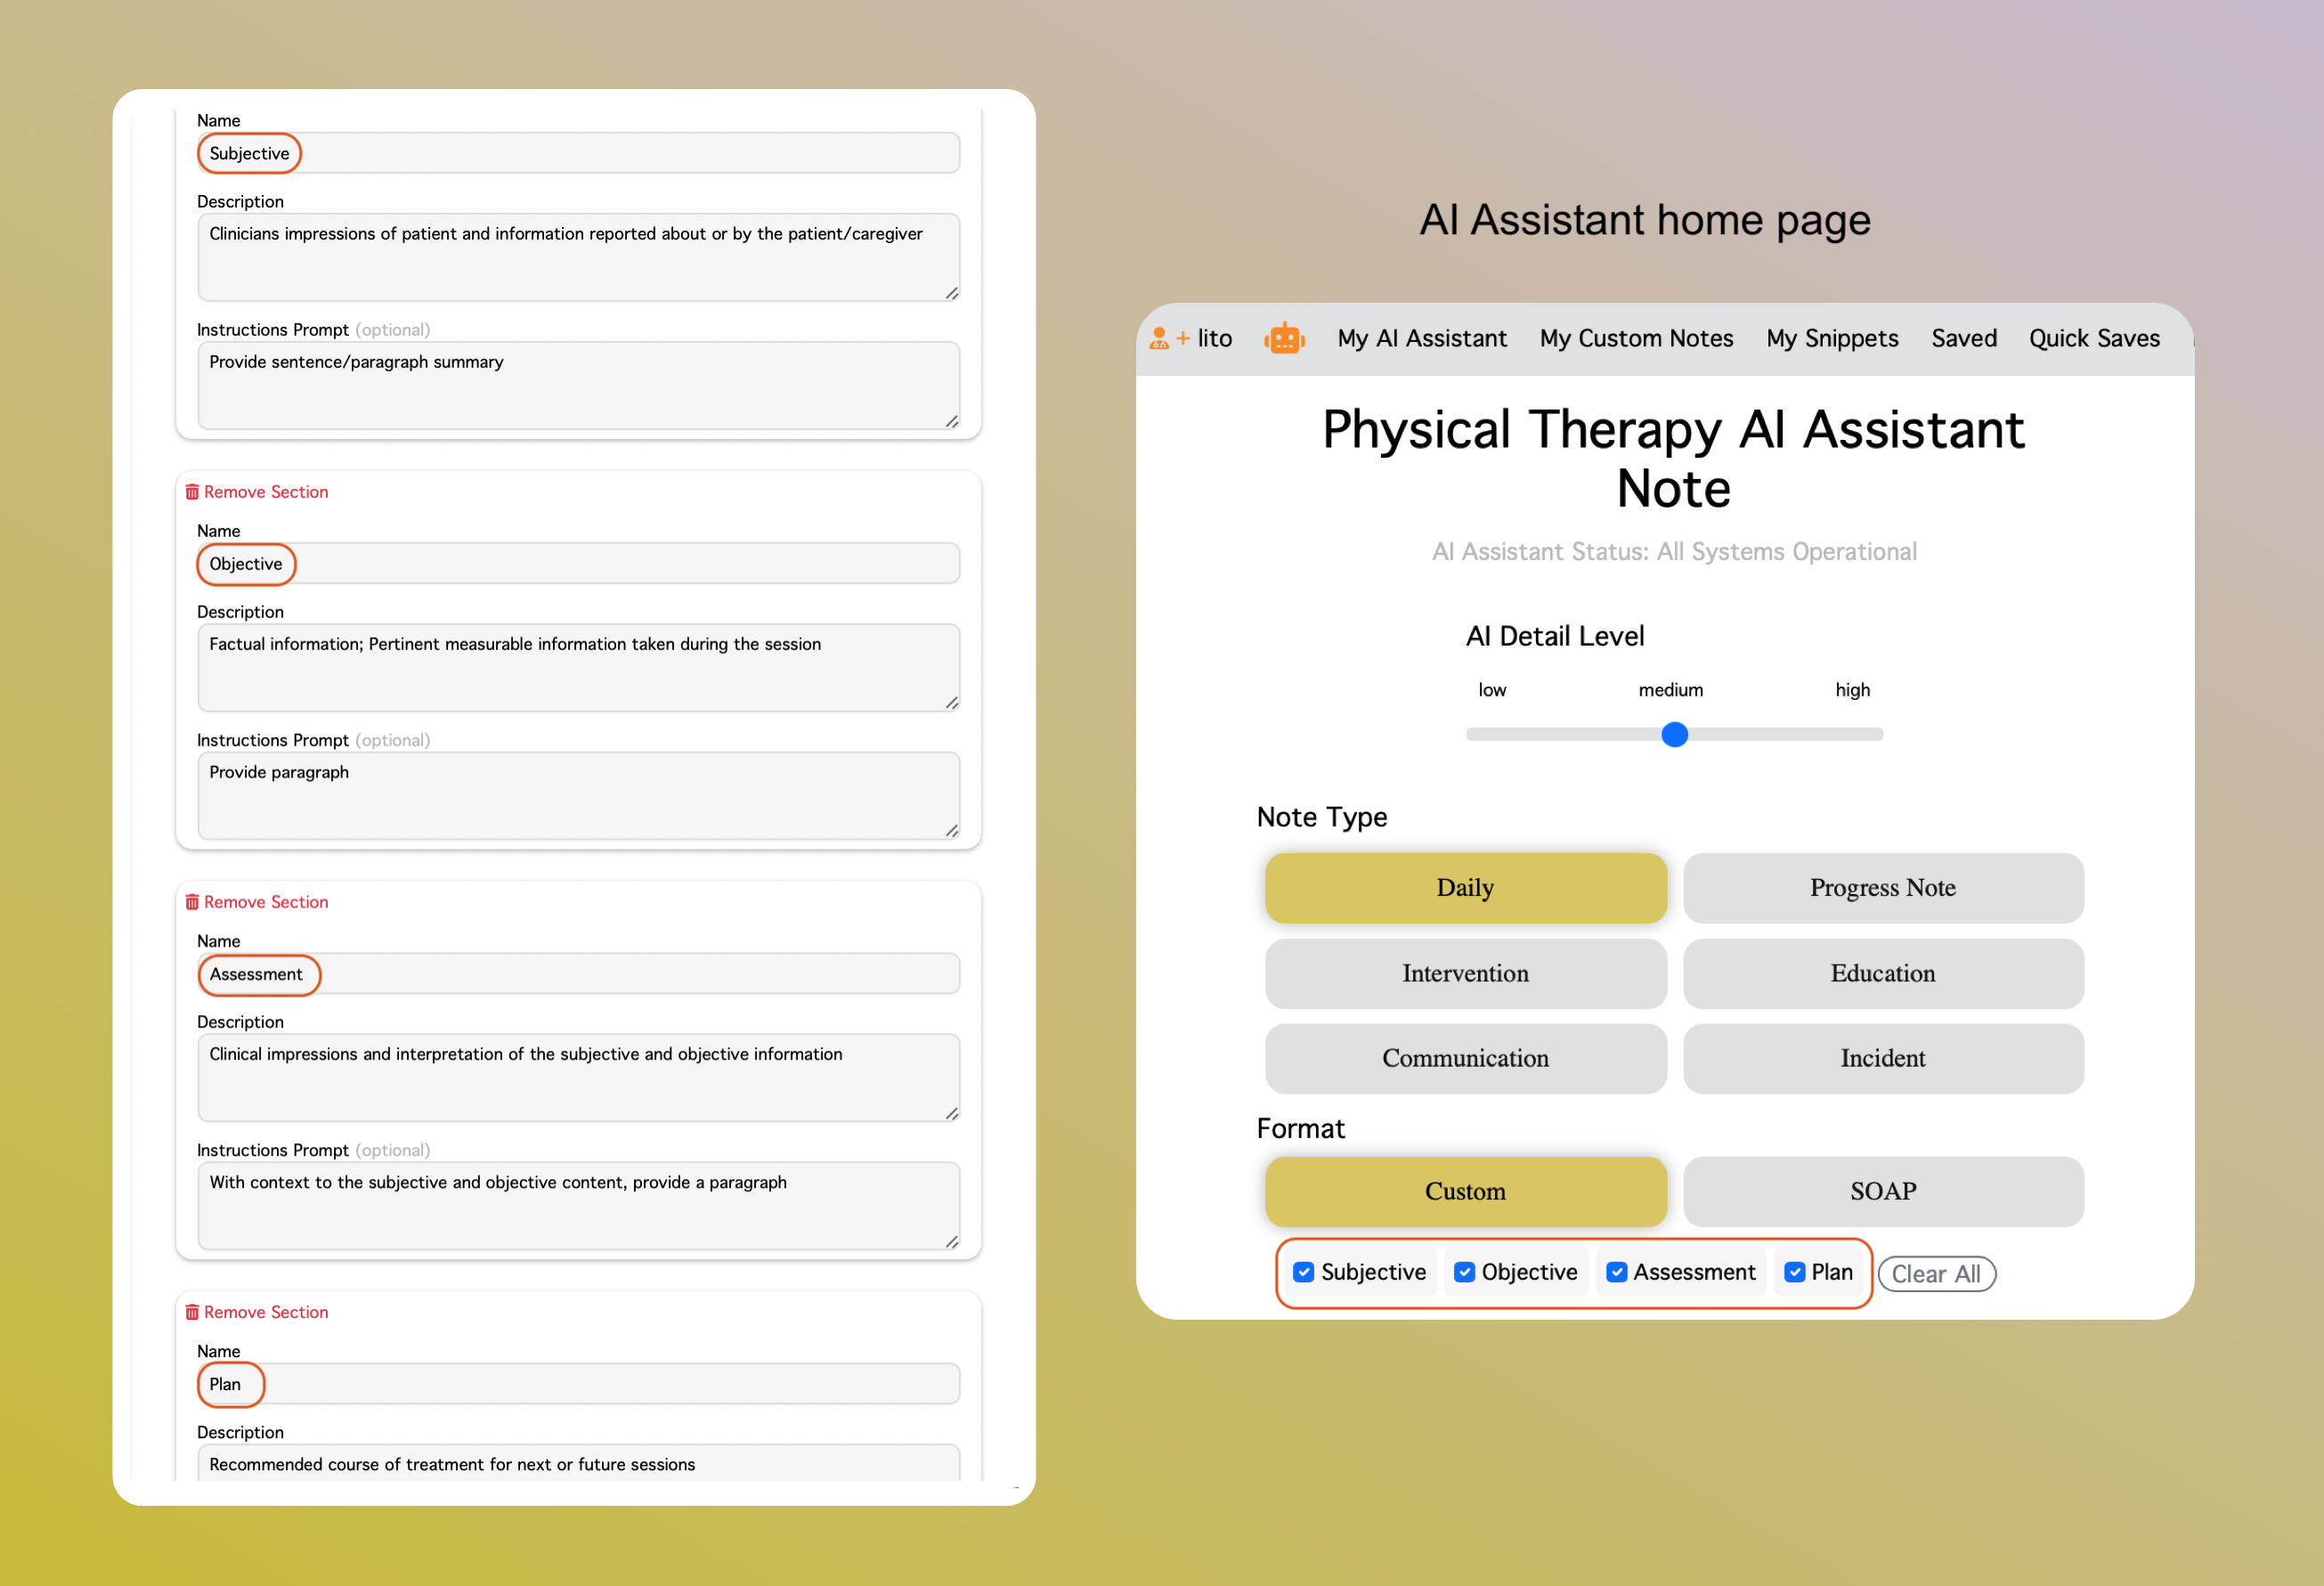
The My Custom Notes tab lets you take control of your AI Assistant home page. From here, you can reorder notes to adjust how they appear, create entirely new notes, edit or update existing ones, and delete notes that you no longer need. This section acts as your personal playground for tailoring the AI Assistant to your exact workflow. The playground gives you tools to experiment with and refine your custom notes before making them part of your regular workflow. Here you can: You can click the horizontal ellipsis (…) for more options and to see custom note details. Use the up and down arrows to reorder notes. Your updated order will appear automatically on the AI Assistant home page. You can remove notes from Saved Notes by clicking on the Remove button and clicking again to confirm. You can re-save notes at any time. Notes you create are listed under the Created Notes section in the sidebar—click on the note and you will be redirected to Note Details page. Here you can Save and you can also permanently delete a note, unless it has already been saved by other users. If you follow other users, you can visit their page to browse their custom notes. From there, you can save notes you may have accidentally removed or any that you find useful. When creating a new custom note, you’ll follow a simple step-by-step process. Custom notes are flexible, so you can either build them from scratch or start by editing an existing note to match your workflow. The core structure of a custom note is straightforward: give it a name, add a description, and optionally include an instructions prompt. This forms the foundation of every note. Later, you can enhance it by adding custom sections, but those are entirely optional. In the example below, we’re editing an existing note called Daily Note. The process looks exactly the same as creating a brand-new note, which makes it easy to experiment and learn. Each section you add to a note will appear on your AI Assistant home page whenever you use that custom note. This makes it easy to tailor your notes to match your EMR or documentation style. You can select sections or remove ones you don’t need, giving you full control over the final output. After you’ve filled in the note details and (optionally) added sections, you should test the note to make sure it works as intended. Testing lets you preview how the AI will generate the note, giving you a chance to fine-tune your instructions. In the first example below, the instructions prompt requests “3 numbered items” for the Plan section. Try experimenting with different instructions to see how it changes the output. In the second example below, the description and instructions prompt were adjusted for the Plan section. The instructions now read: "Recommended course of treatment for next session". Unlike the first example, this prompt requests a single sentence instead of three numbered items, and it also directs the AI to connect the plan to any presenting issues from today’s session (Description). This gives the AI clearer guidance, reducing guesswork and producing more relevant, accurate results. Try experimenting with different instruction styles to see how they change the output. You can click Save Custom Note at any time to make sure your work is stored and won’t be lost. Saved notes can always be reopened from the sidebar, where you can continue editing or updating them whenever needed. My Custom Notes
AI Assistant Playground
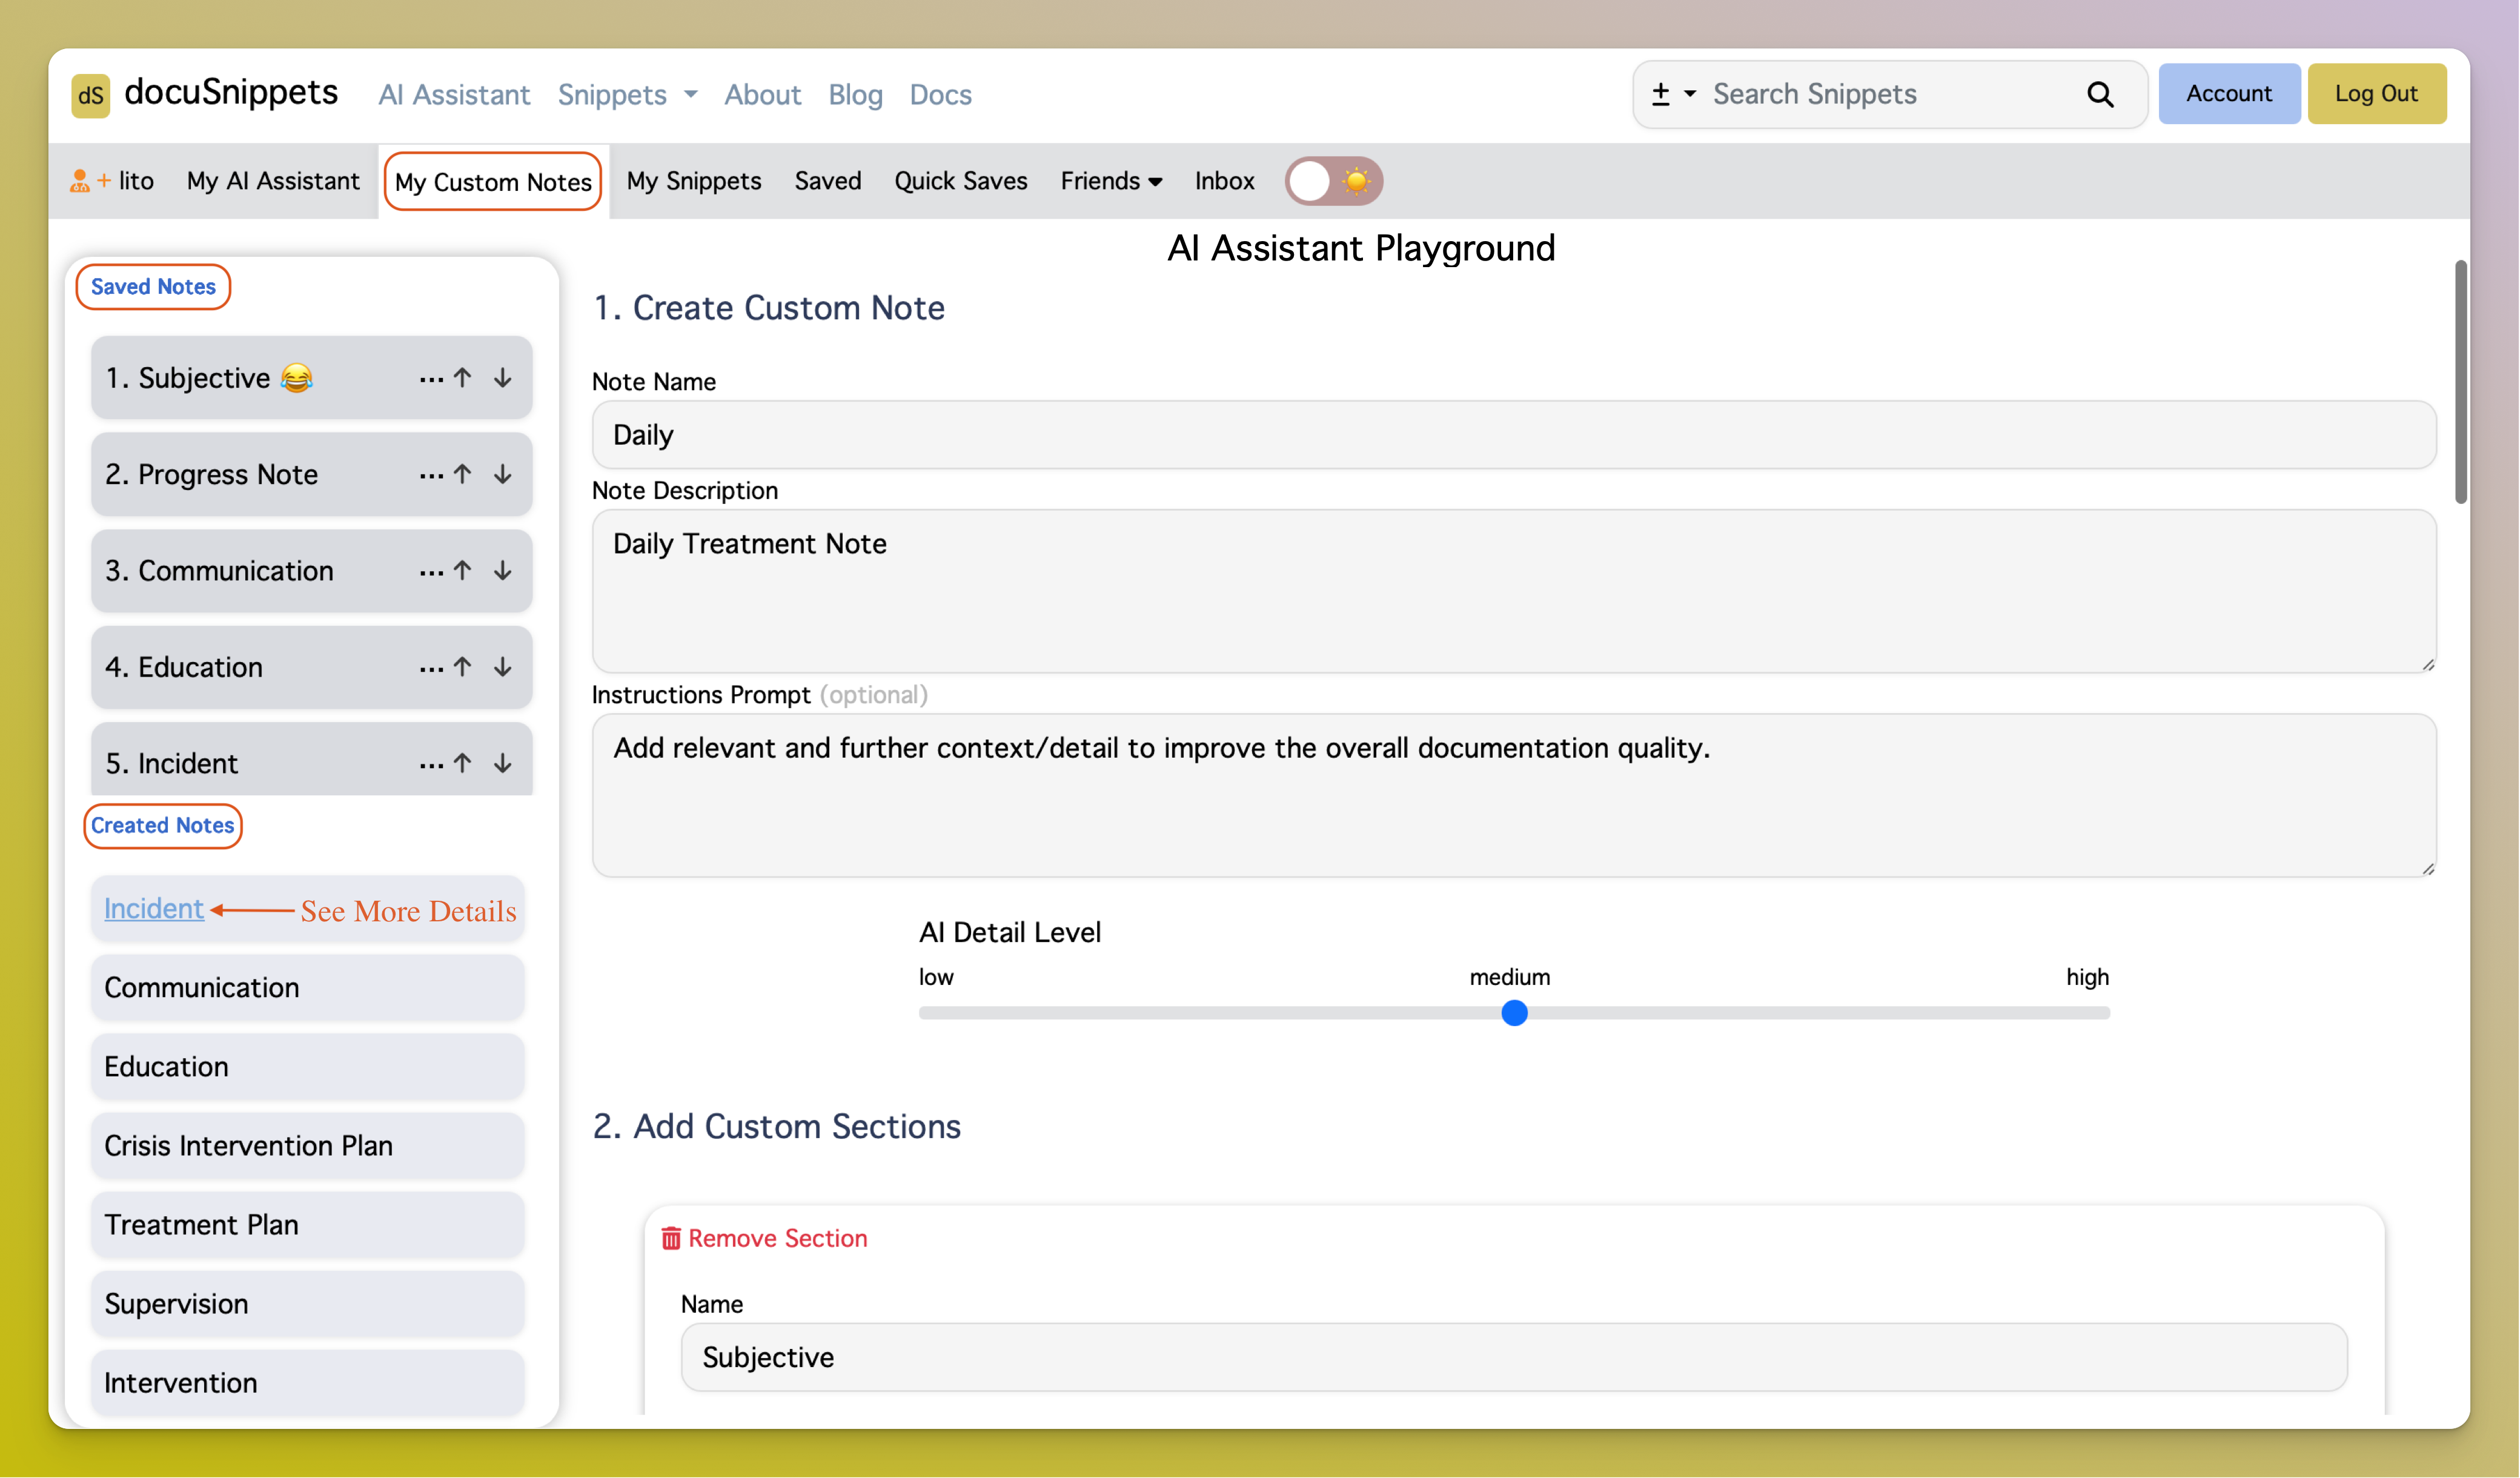
Sidebar - Saved and Created Notes

Creating a Custom Note
The level you choose works in combination with your descriptions and prompts. If no sections are added, more detail here can help refine the AI’s output. 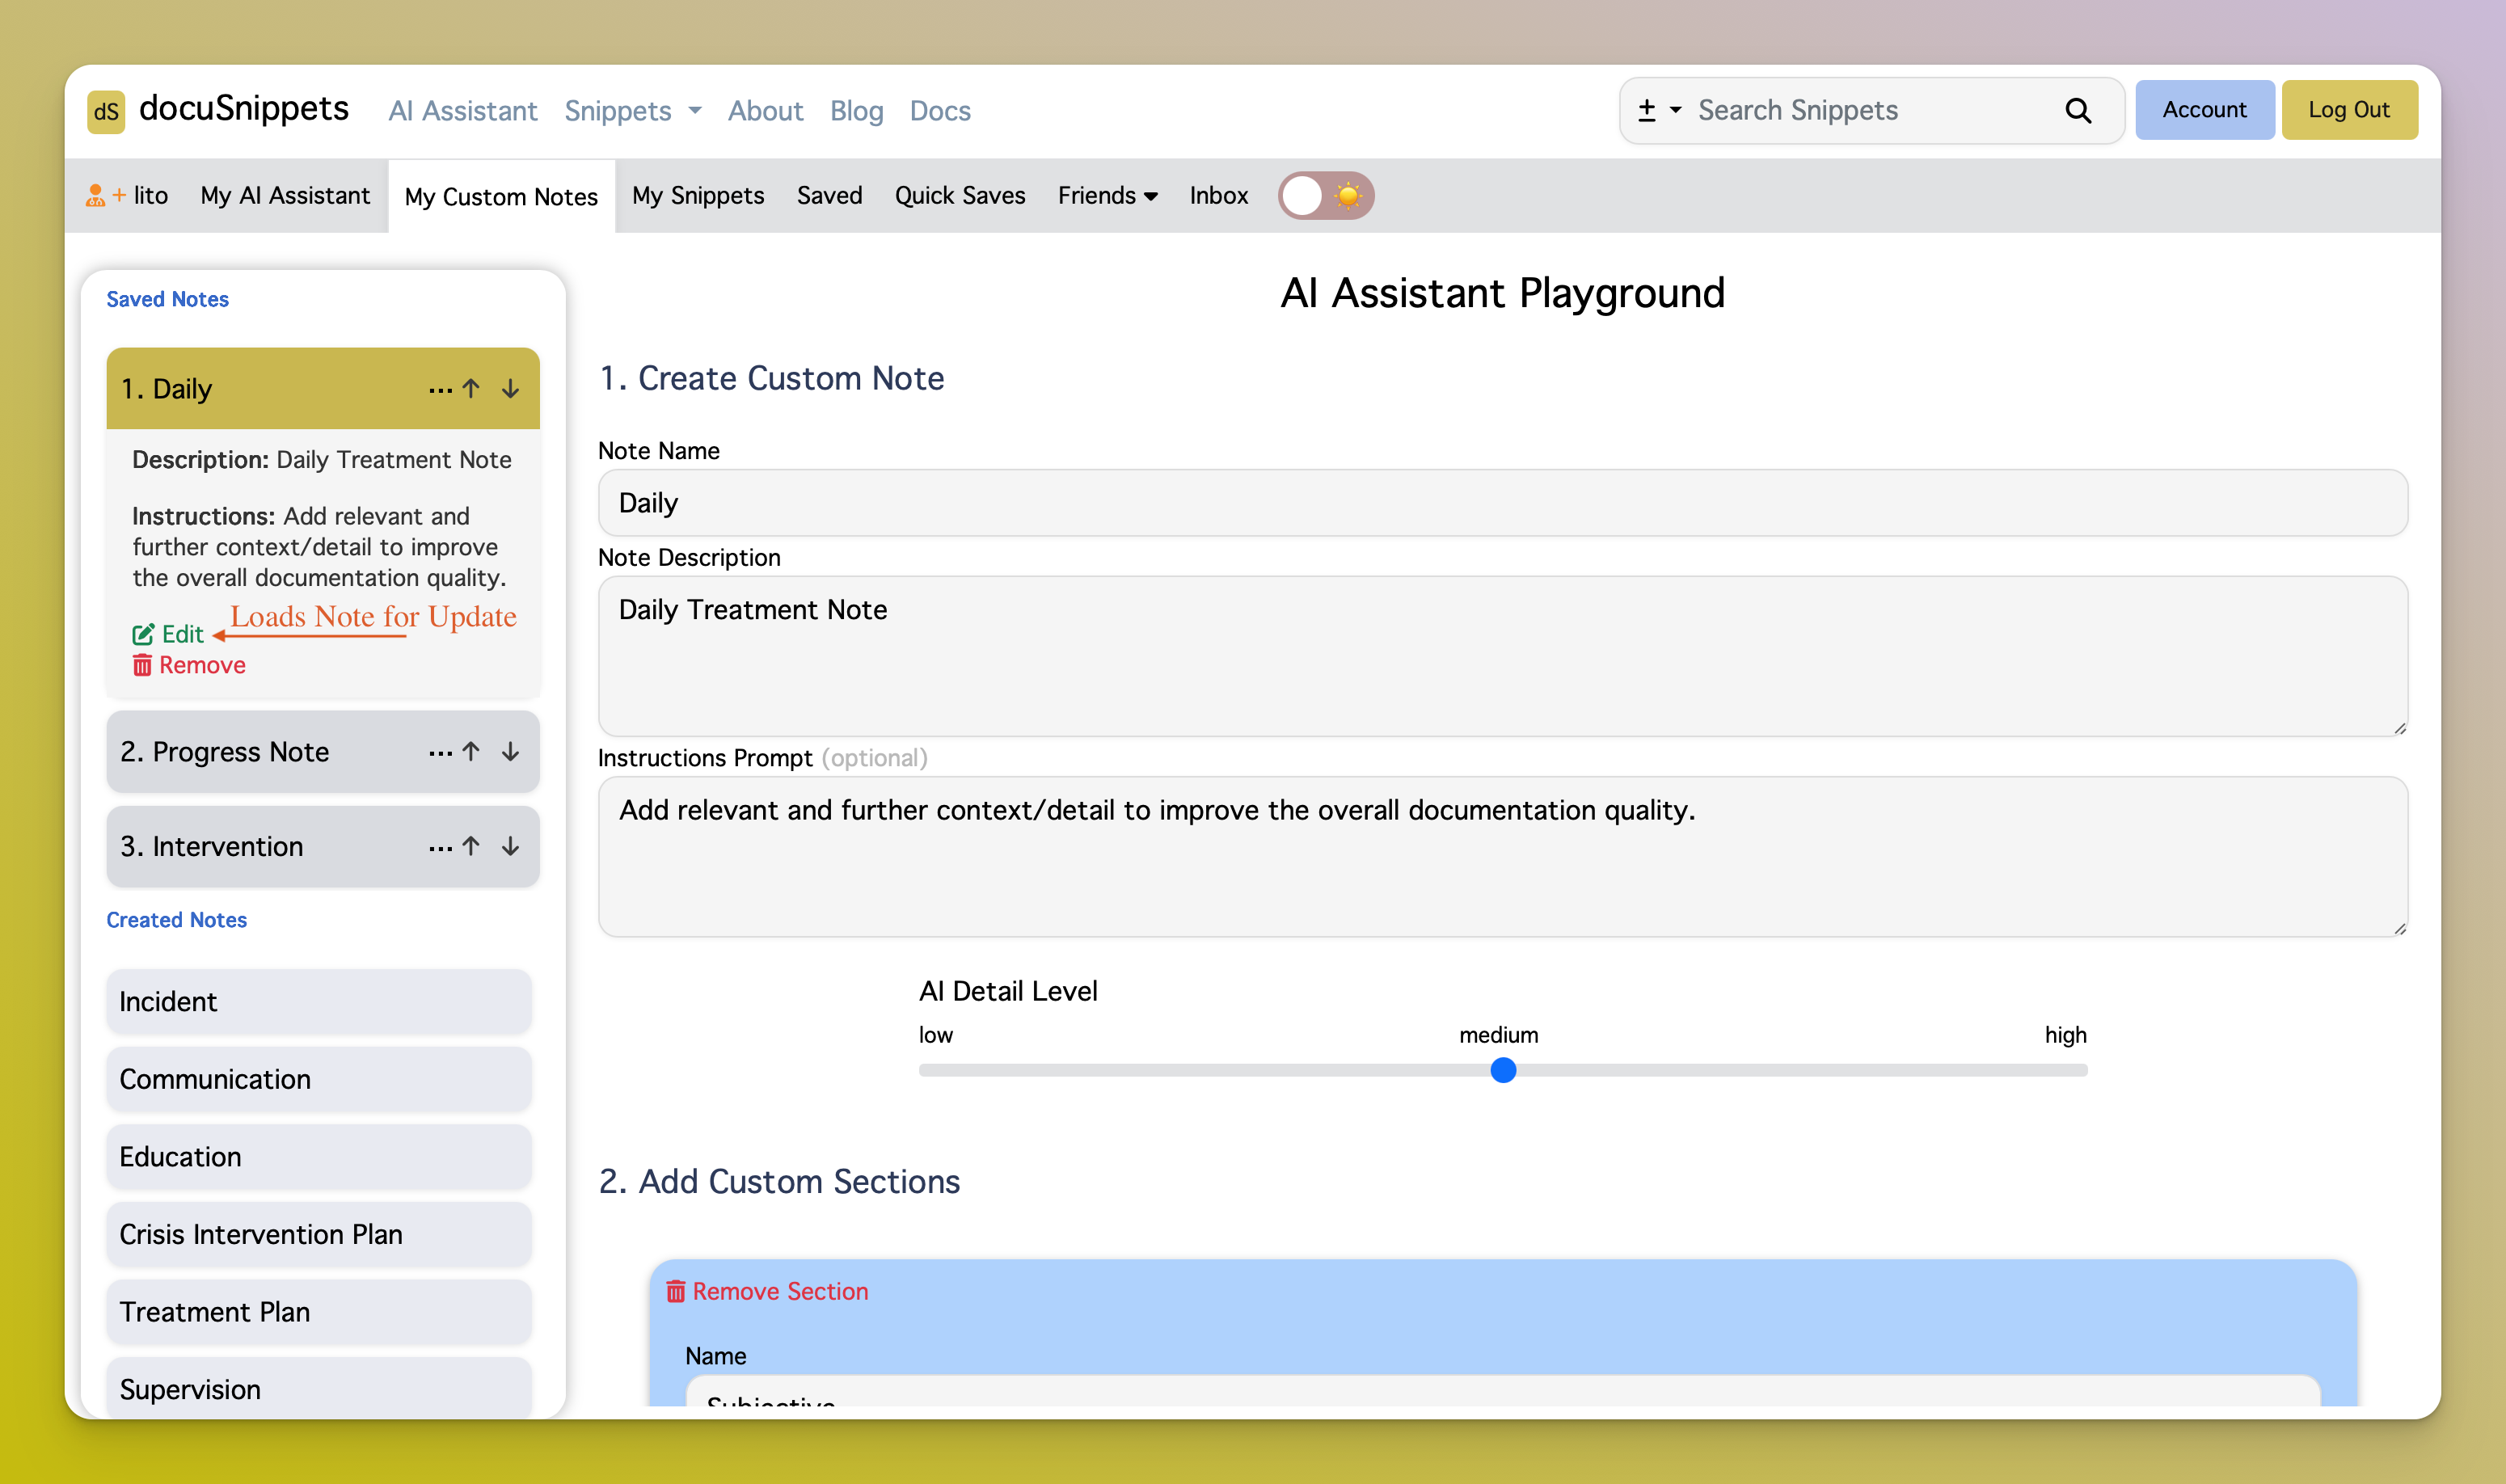
Custom Sections
Testing a Custom Note